|
||||||||||||||||||||||||||||||||||||||||||||||||||||||||||||||||||||||||||||||||||||||||||||||||||||||||||||||||||||||||||||||||||||||||||||||||||||||||||||||||||||||||||||||||||||||||||||||||||||||||||||||||||||||||||||||||||||||||||||||||||||||||||||||||||||||||||||||||||||||||||||||||||||||||||||||||||||||||||||||||||||||||||||||||||||||||||||||||||||||||||||||||||||||||||||||||||||||||||||||||||||||
|
|
||||||||||||||||||||||||||||||||||||||||||||||||||||||||||||||||||||||||||||||||||||||||||||||||||||||||||||||||||||||||||||||||||||||||||||||||||||||||||||||||||||||||||||||||||||||||||||||||||||||||||||||||||||||||||||||||||||||||||||||||||||||||||||||||||||||||||||||||||||||||||||||||||||||||||||||||||||||||||||||||||||||||||||||||||||||||||||||||||||||||||||||||||||||||||||||||||||||||||||||||||||||
| |
||||||||||||||||||||||||||||||||||||||||||||||||||||||||||||||||||||||||||||||||||||||||||||||||||||||||||||||||||||||||||||||||||||||||||||||||||||||||||||||||||||||||||||||||||||||||||||||||||||||||||||||||||||||||||||||||||||||||||||||||||||||||||||||||||||||||||||||||||||||||||||||||||||||||||||||||||||||||||||||||||||||||||||||||||||||||||||||||||||||||||||||||||||||||||||||||||||||||||||||||||||||
|
||||||||||||||||||||||||||||||||||||||||||||||||||||||||||||||||||||||||||||||||||||||||||||||||||||||||||||||||||||||||||||||||||||||||||||||||||||||||||||||||||||||||||||||||||||||||||||||||||||||||||||||||||||||||||||||||||||||||||||||||||||||||||||||||||||||||||||||||||||||||||||||||||||||||||||||||||||||||||||||||||||||||||||||||||||||||||||||||||||||||||||||||||||||||||||||||||||||||||||||||||||||
|
1. INTRODUCTION
The purpose of this file is to provide an overview of the fleets, commands, squadrons and flotillas of the Royal Navy during the Great War. The Board of Admiralty was the highest level of command. From it came the strategic guidance, the manpower, and the resources to prosecute the war. With its guidance, the Royal Navy had two levels of command for the conduct of operations. - the fleets
and stations
- squadrons and flotillas A major distinction between the two levels of command is the direct link in the chain of command between the Admiralty and the fleets and commands. Squadrons and flotillas, and some 'forces' operated with their assigned fleet or station. A fleet consisted of the full spectrum of warships designed for major action against an enemy fleet - battleships, cruisers, and destroyers. The fleet would consist of battle squadrons, cruiser squadrons, and destroyer flotillas. There was a standard composition for each of these. A station was a major geographic command responsible for the conduct of operations within its area. It could have squadrons, flotillas, and individual ships under command. A battle squadron would consist of eight battleships which would be divided into two divisions of four ships each. The squadron would be commanded by a vice admiral, with a rear admiral as second in command. As the war progressed battle squadron size could increase to nine or ten ships to maintain full strength while ships were under repair or refit. Each battle squadron was supported by a cruiser squadron of four ships commanded by a rear admiral. As the war progressed the size of the cruiser squadron increased for the same reason as that of the battle squadron. Cruiser squadrons also operated in the more distant stations where their composition varied considerably. As for the smaller vessels - torpedo boat destroyers, submarines, sloops and minesweepers-originated as 'boats' rather than 'ships', they were organised into flotillas. In the main fleets, destroyer flotillas were allocated initially on the basis of one flotilla per battle squadron. The number of flotillas so allocated increased during the war. The initial composition of a destroyer flotilla was twenty destroyers with the flotilla commander - a captain - embarked on a cruiser. Submarine
flotillas did not have a standard organisation; nor did
sloop flotillas. For tactical reasons, minesweeping
flotillas needed a standard organisation.
The Board of
Admiralty
The Commands The major
commands
The Grand
Fleet
The Channel Fleet The Third Fleet The Home Commands Nore,
Portsmouth, Plymouth, Irish Coast, Scottish Coast The Overseas Commands Atlantic
Cruiser Forces
Mediterranean, East Indies, China The lower
level of command comprised:
1st-9th
Battle Squadrons
1st-3rd Battle-Cruiser Squadrons The Flying Squadron 1st-12th Cruiser Squadrons 1st-8th Light Cruiser Squadrons 1st-15th & 20th Destroyer Flotillas Local Defence Flotillas 1st-13th & named Submarine Flotillas 1st-4th & 9th-13th Sloop Flotillas 1st-21st Minesweeping Flotillas. In addition
there were a number of named forces which moved between
the two levels of command. They will be dealt with where
appropriate.
Included are:
Northern
Patrol,
Harwich Force, Dover Patrol, Eastern Mediterranean Squadron, British Adriatic Force. Not included are the well-known orders of battle for major clashes such as Jutland which are well-known. For
Royal Navy
campaigns, battles and actions, see the five volume
official
"History of the Great War - Naval Operations" by Corbett and Newbolt Warships and auxiliaries - see Ships of the Royal Navy 1914-1919 Many major warship histories, especially overseas - see Royal Navy Log Books 2.
THE BOARD OF ADMIRALTY
THE BOARD As constituted on 20th October 1904, the Board was composed of politicians, naval officers, and a civil servant. Each had a specific area of responsibility but all decisions had to be made by the Board. The chairman of the Board was the First Lord of the Admiralty. He was a member of the Cabinet and responsible to the Parliament for all aspects of the naval service: including policy, senior appointments, budgets and ship building programmes. The four naval officers were: the First Sea
Lord whose duty was to ensure the 'fighting and seagoing
efficiency of the fleet;
the Second Sea Lord for manpower and training; the Third Sea Lord for the design and construction of ships and weapons; and the Fourth Sea Lord for supplies and transport. Two other politicians were the Civil Lord, responsible for works and buildings, and the Political and Financial Secretary, responsible for the budget. A second
Civil Lord was appointed in 1912 to look after contracts
and the dockyards.
Finally, the Permanent Secretary was the lone
civil servant.WAR
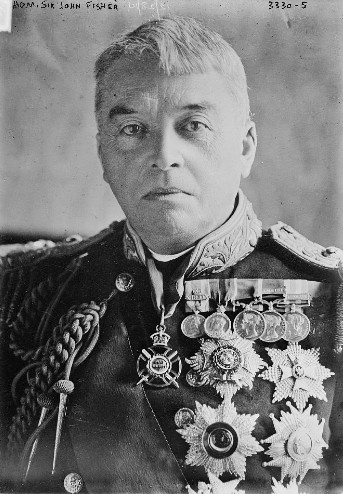
STAFF
 Lord Fisher A major aspect of this organisation, which was created by Sir John Fisher when he became First Sea Lord was the absence of any naval staff or machinery for planning naval strategy and for the conduct of naval operations. This was the prime task of the First Sea Lord who, without any staff or advisers, evolved a naval strategy which remained hidden in his head. To counteract that, a Naval War Staff was created on 8th January 1912. Formed by the enlargement of the Directorate of Naval Intelligence, its Chief supervised directorates on: operations,
intelligence, mobilisation and trade. The role of the Chief of the War Staff was to advise the Board on all the matters relevant to the staff. He could not make decisions on the conduct of operations. The relationship between him and the First Sea Lord was ill-defined both by role and by rank. In August 1914, the Royal Navy went to war with an unclear planning organisation whose problems were compounded by a hyper-active interventionist First Lord - Winston Churchill. The story of the naval staff component within the Admiralty between 1914 and 1918 was to evolve a more effective structure for the conduct of the war at sea. The more traditional view is that the pressure for change came from outside the navy - from press and politicians who had expected a more active and victorious role for the Royal Navy. More recent work suggests that the naval staff grew in ability, size, and effectiveness through its own efforts. The basic structure of the Admiralty remained largely unchanged until the spring of 1917. By then the disappointment over Jutland merged with alarm at the success of the German U-boats against the trade routes reached such a level in the press and in parliament that change had to occur, There were two basic changes. The War Staff was developed into a properly organised naval staff and placed under the command of the First Sea Lord who became First Sea Lord and Chief of the Naval Staff. As such he had the executive authority - free from the Board - to conduct naval operations. To balance this change of role, the Admiralty was effectively divided into two bodies. The operations staff was the naval staff while the administrative staff dealt with non-operational matters. A new post, that of Controller was created to co-ordinate the work of the other Sea Lords whose duties wre more clearly defined by changes of title. The Controller was a civilian businessman. The first occupant of the new post was Sir Eric Geddes who went on to become First Lord of the Admiralty. MAJOR
POSTS AND PERSONNEL IN THE ADMIRALTY 1914-1919
First
Lord of the Admiralty
Winston
Churchill
25.05.15-Arthur Balfour 11.12.16-Sir Edward Carson 20.07.17-Sir Eric Geddes 16.01.19-Walter Long Naval
Secretary to the First Lord [advises
on matters such as officer promotions and
appointments]
Rear
Admiral Dudley de Chair
8.14-Rear Admiral Horace Hood 10.14-Rear Admiral Henry Oliver 11.14-Commodore Charles de Bartoleme 12.16-Commodore Alan Everett 10.18-Commodore Rudolph Bentinck First Sea Lord to 30th April 1917 Admiral
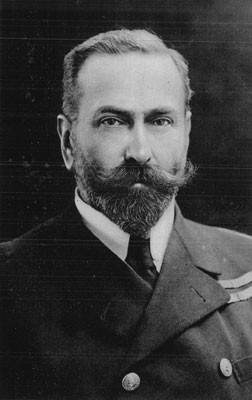
Prince Louis of Battenburg
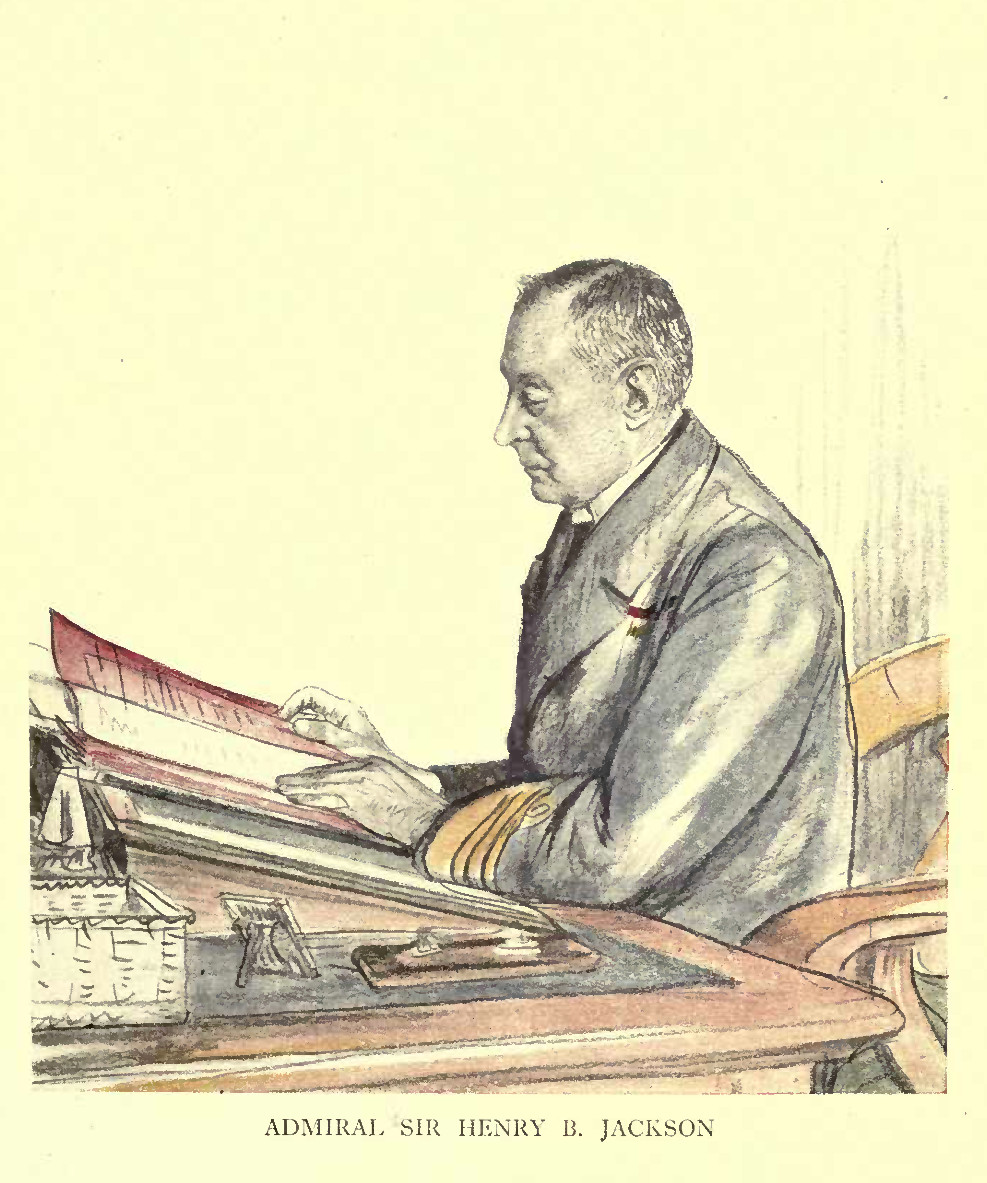
29.10.14-Admiral of the Fleet Lord Fisher 15.05.15-Admiral Sir Henry Jackson 10.12.16-Admiral Sir John Jellicoe ("The Crisis of the Naval War" by Adm Jellicoe)
Chief
of the War Staff to 30.4.1917
Vice
Admiral Doveton Sturdee
00.11.14-Vice Admiral Henry Oliver
Directors
in the War Staff to 4.17:
Director of Naval Intelligence Rear
Admiral Henry Oliver
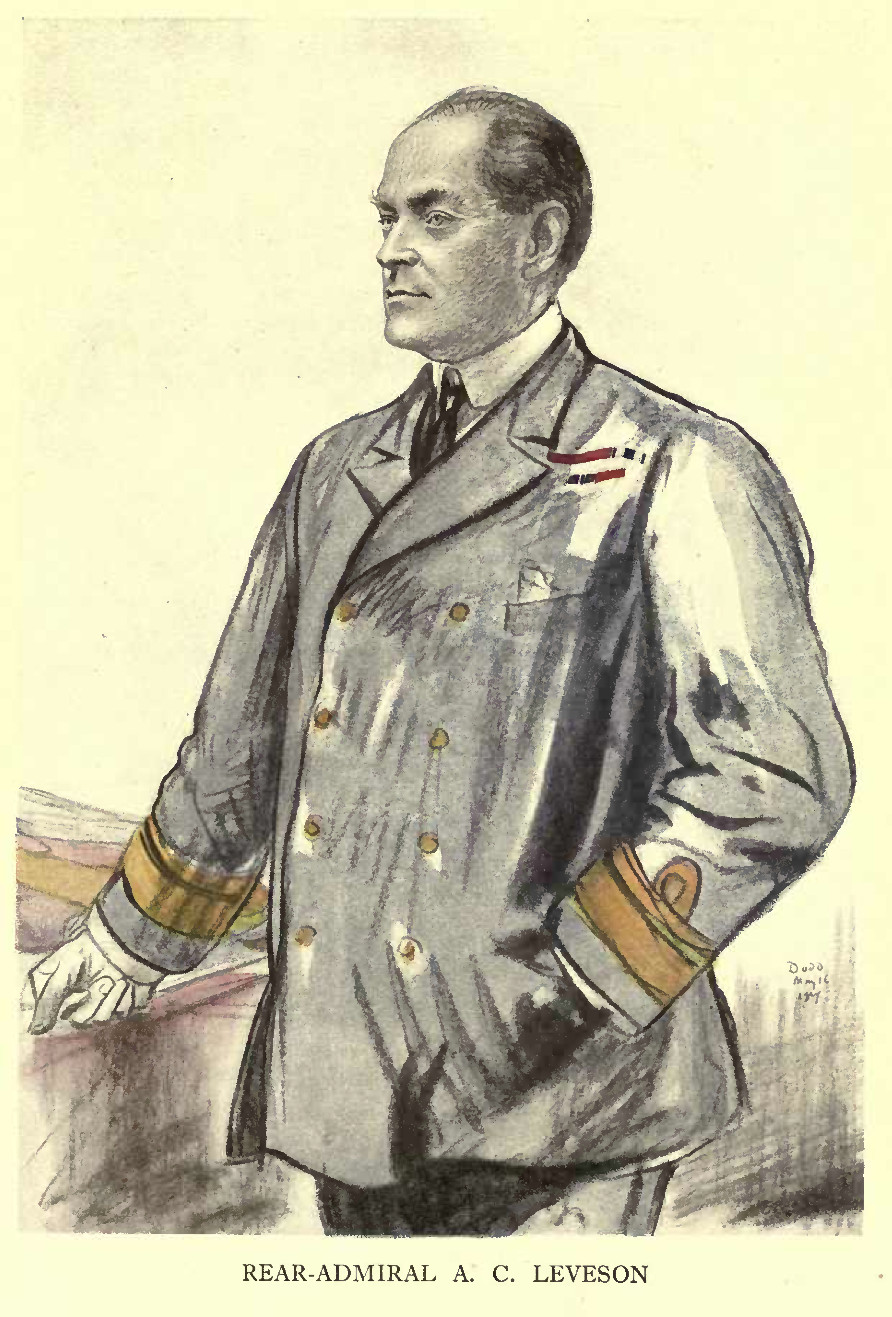
11.14-Commodore Reginald Hall Director Operations Division Rear
Admiral Arthur Leveson
1.15-Rear Admiral Thomas Jackson Director
Mobilisation Division
Rear
Admiral Alexander Duff
10.14-Captain Hugh Sinclair 6.16-Rear Admiral Michael Culme-Seymour Director Trade Division
Captain Richard Webb
Director Anti-Submarine Division from 12.16- Rear
Admiral Alexander Duff
under
First Sea Lord
Director
Naval Air Division 1.17-Fifth Sea Lord
Commodore Murray Seuter
1.17-Rear Admiral Geoffrey Paine
Retired flag officer 'attached' to War Staff/Naval
Staff
Admiral of the Fleet Sir Arthur Wilson 8.14-11.18 [a former First Sea Lord] Vice Admiral Sir Edmund Slade 4.15-11.18 Vice Admiral Sir Douglas Gamble 7.15-5.17 Vice Admiral Sir Robert Ommanney 8.15-12.18 The
Naval Staff 30.4.1917-31.3.19
The structure of the staff was established in May 1917 and changed in October 1917: 1.
May -October 1917
First
Sea Lord & Chief of the Naval Staff
Deputy Chief of the Naval Staff (DCNS) Assistant Chief of the Naval Staff (ACNS) (Divisions) Operations Div., Mobilisation Div., Intelligence Div., Trade Div., Anti-Sub. Div., Minesweeping Div. 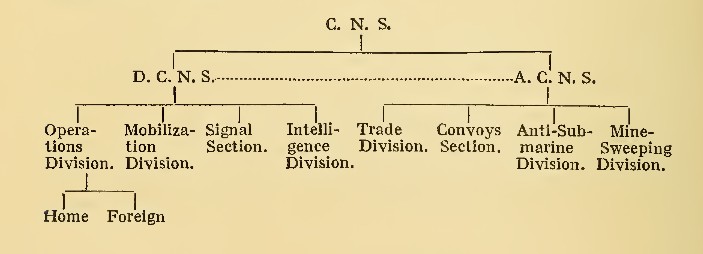 From
"The Crisis of the Naval War" by Admiral Jellicoe. Note:
at this time, Signals and Convoys were Sections
2. October 1917-March 1919 First
Sea Lord & Chief of the Naval Staff
(Divisions) Intelligence Div., Training & Staff Duties Div. Deputy First Sea Lord (D1SL) [Policy & Overseas matters] (Division) Operations Div. [Foreign] Deputy Chief of the Naval Staff (DCNS) [Home waters] (Divisions) Signal Div., Operations Div [Home], Plans Div., Air Div., Assistant Chief of the Naval Staff (ACNS) [Trade Protection] (Divisions) Trade Div., Mercantile Movements Div., Minesweeping Div., Anti-Sub. Div. 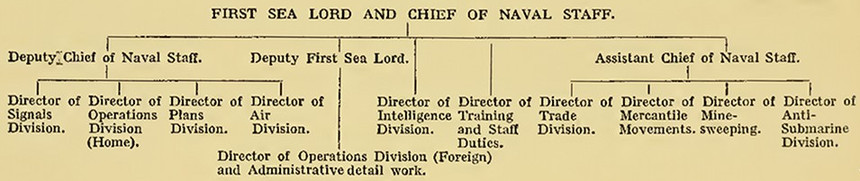 From "The Crisis of the Naval War" by Admiral Jellicoe. Note: this is the final organisation under Admiral Wemyss in 1918. Admiral Jellicoe's for the latter part of 1917 was slightly different. See "Changes in Admiralty Departments" 1913-1920. The two most important changes were the allocation of specific divisions to DCNS, ACNS and the new post of D1SL (Deputy First Sea Lord). Created with two purposes - to take the administrative burden off Admiral Jellicoe [a persistent centraliser and micro-manager] and to address the anomaly that, under the old system, the First Sea Lord's deputy was the Second Sea Lord. By this stage of the war, the Second Sea Lord had no experience of operational management. With the effective division of the Admiralty into an operations division and a 'maintenance' division, the Second Sea Lord would never have the experience to deputise for the First Sea Lord. Chief
post holders of the Naval Staff 4.17-3.19
First Sea
Lord & Chief of the Naval Staff
Admiral
Sir John Jellicoe
27.12.17-Admiral Sir Rosslyn Wemyss -11.19 Director
of Naval Intelligence
Rear
Admiral Reginald Hall
Director Training & Staff Duties 1.18-Rear
Admiral James Ley
4.18-Captain Herbert Richmond Deputy First Sea Lord (D1SL) 10.17-Vice
Admiral Rosslyn Wemyss
12.17-Rear Admiral George Hope Director
Operations [Foreign]
1.18-Captain C R Coode
Deputy Chief of the Naval Staff (DCNS) Vice
Admiral Henry Oliver
1.18-Rear Admiral Sydney Fremantle Director
Plans Division
6.17-Rear Admiral Roger Keyes
1.18-Captain C M T Fuller Director Operations Division 1.18-Director Operations Division [Home]
4.17-Rear Admiral George Hope
1.18-Captain Dudley Pound (Air Division) Fifth Sea Lord & Chief of Naval Air Service -31.3.18 Rear
Admiral Geoffrey Paine
1.18-Captain F S Scarlett Signals Section, upgraded to Signals Division, 9.17 9.17-Captain Richard
Nocholson
Assistant Chief of the Naval Staff (ACNS) Rear
Admiral Alexander Duff [1.18-Vice Admiral]
Director Anti-Submarine Division
Captain W W Fisher
Director Mercantile Movements
Captain B Smith
Director Minesweeping Division 23.5.17-
Captain L G Preston
Director Trade Division Rear
Admiral Richard Webb
10.17-Captain A Hotham Director Mobilisation Division [place in structure uncertain] Rear
Admiral Michael Culme-Seymour
Director Artillery & Torpedoes
6.18- [place
in structure uncertain]
9.18-Rear Admiral Edmund Hyde-Parker
6.18-Captain F Dreyer
Note: almost all the above attained high positions in the Royal Navy 1919-1939 [note Dudley Pound, First Sea Lord, 1939-43] As well as these re-organisations, the size of the naval staff increased substantially between 1914 and 1918. In July 1914 the staff totalled 13 flag officers and 15 captains. In September 1918 the numbers were seven flag officers (actually a reduction in this case) and 40 captains. In addition, one major general RM and two brigadier generals RM served on the naval staff. In contrast to the evolution of the naval staff, what might be referred to as the administrative components of the Admiralty remained relatively unchanged in terms of structure and the allocation of duties. The major change came with the appointment of Sir Eric Geddes as Controller in May 1917 [he insisted on the honorary rank of Vice Admiral which irritated the admirals]. The principal officers were- under First
Sea Lord
Director, Navigation Captain
Nelson-Ward
8.16-Captain J A Webster Hydrographer Captain
J Parry
Second Sea Lord & Chief of Naval Personnel 12.12-Vice
Admiral Sir John Rushworth Jellicoe, Dec 1912 -Jul
1914
7-14-Vice
Admiral Frederick Hamilton
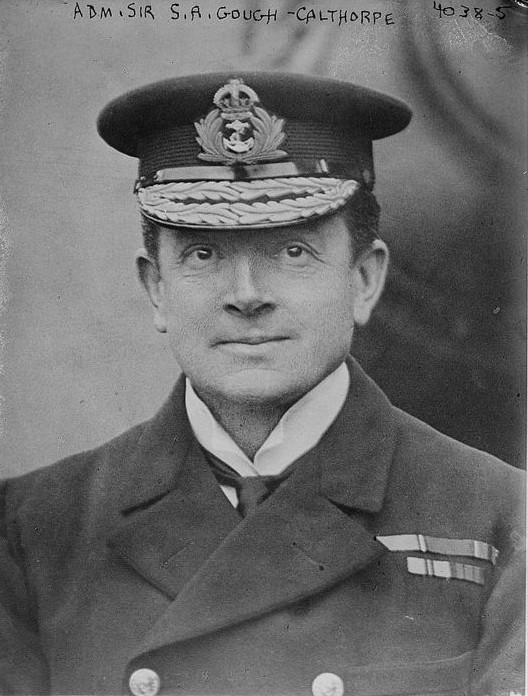
6.16-Rear Admiral Somerset Gough-Calthorpe 12.16-Admiral Sir Cecil Burney 8.17-Vice Admiral Rosslyn Wemyss 10.17-Vice Admiral Herbert Heath
Director,
Training
16-Rear
Admiral Cecil Hickley
Admiral commanding Reserves Vice
Admiral Arthur Farquhar
6.15-Vice Admiral Alexander Bethell 9.16-Rear Admiral Somerset Gough-Calthorpe 7.17-Vice Admiral Cecil Thursby 7.18-Admiral Sir Dudley de Chair President Royal Naval College, Greenwich Vice
Admiral F W Fisher
10.14-Vice Admiral Alexander Bethell 1.15-Vice Admiral Lewis Bayly 7.15-vacant 1.17-Admiral Sir Henry Jackson
Adjutant-General Royal Marines
General
Sir William Nicholls
.16-Major General David Mercer Third Sea Lord & Chief of Naval Materiel [& Chief of Naval Training 5.17- & Controller 6.18-] 6.12-Rear
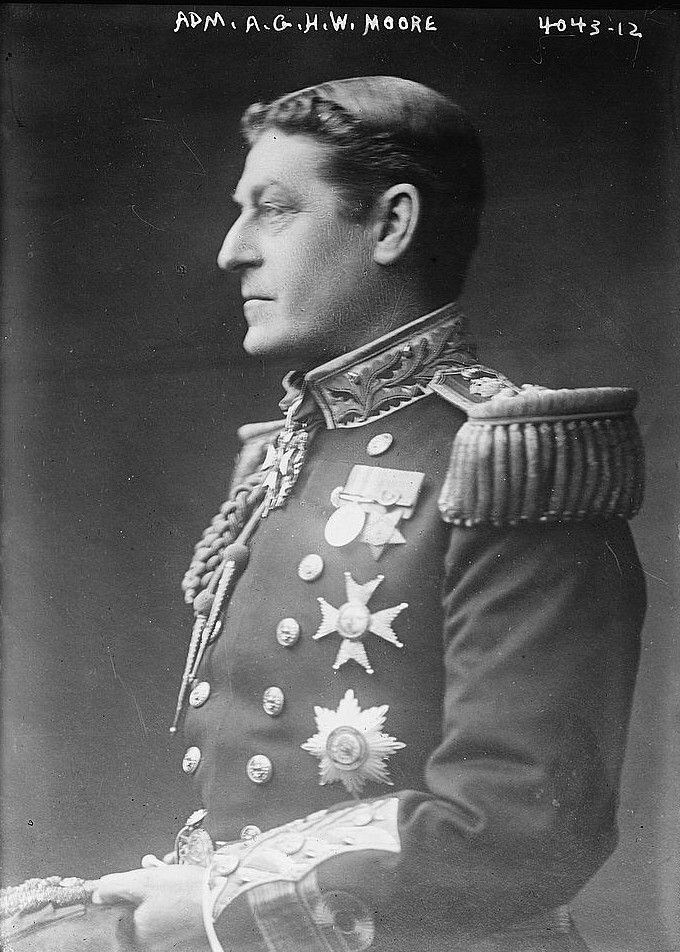
Admiral Archibald Moore
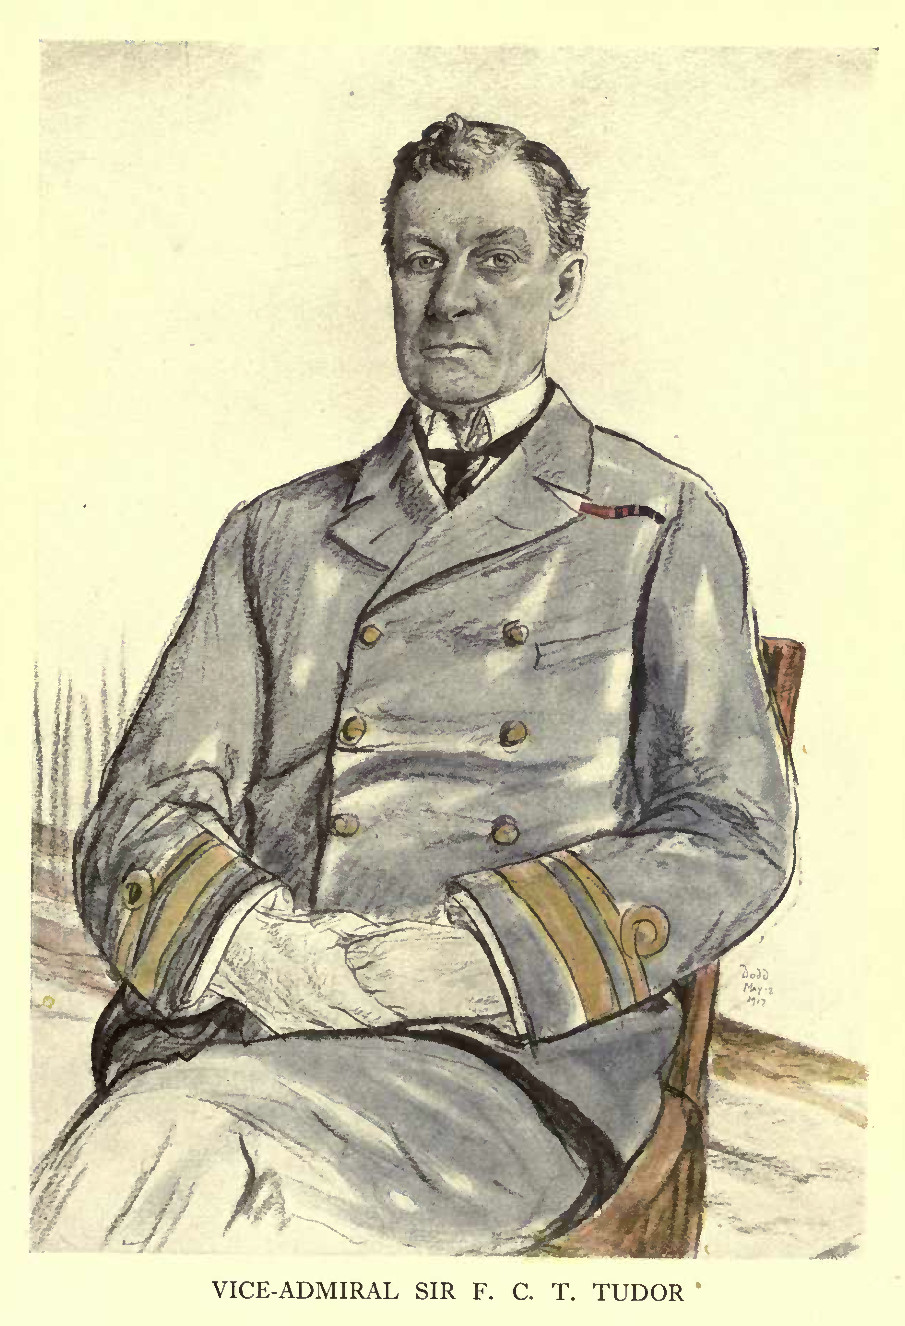
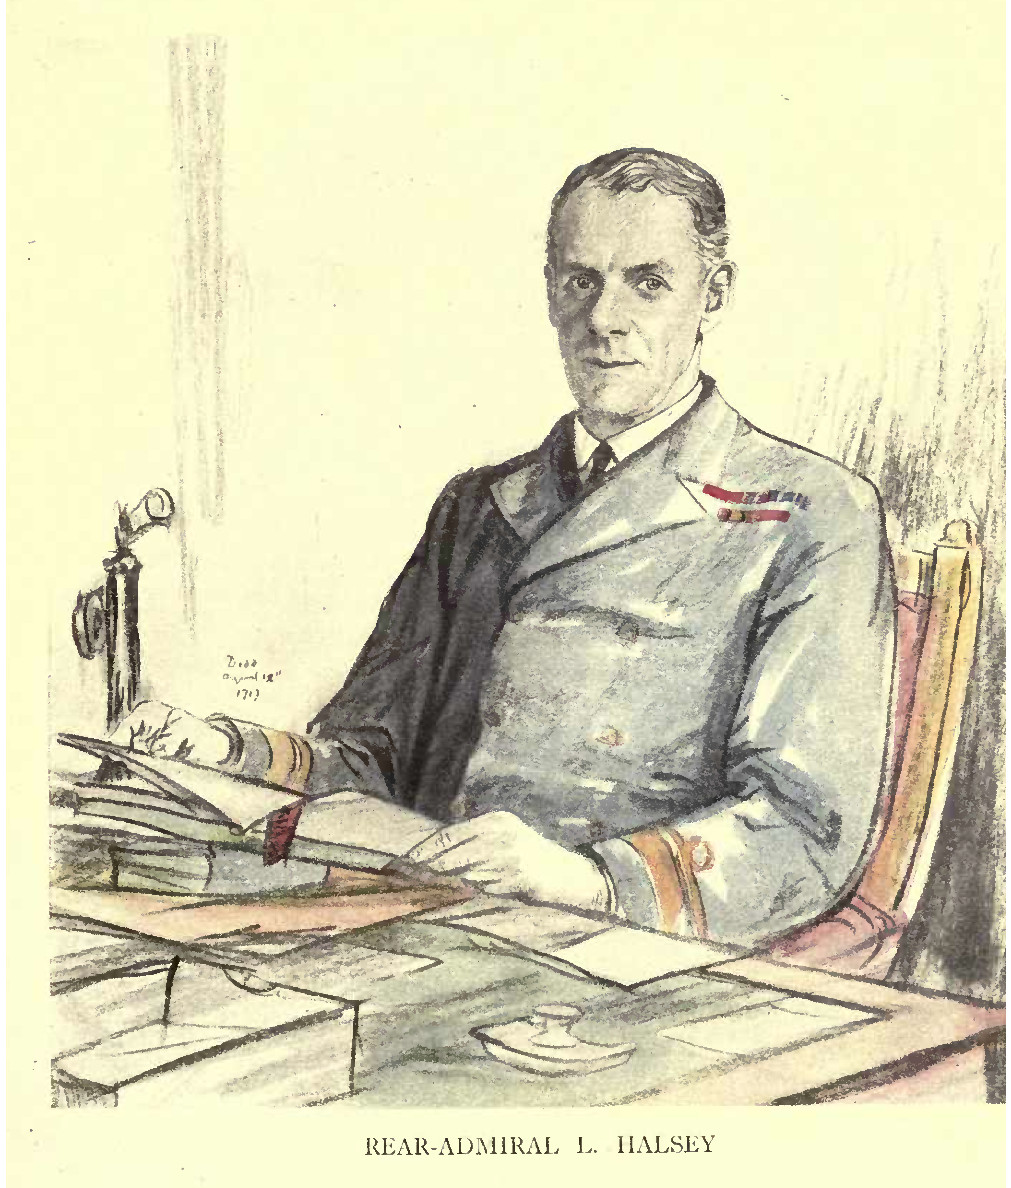
8.14-Rear Admiral Frederick Tudor 5.17-Rear Admiral Lionel Halsey 6.18-Rear Admiral Charles de Bartoleme
Director
Naval Ordnance
Rear
Admiral Morgan Singer
3.17-Captain F Drury 6.18-Captain H R Crooke Director Torpedoes & Mines
4.17-Captain F Field
Director Naval Construction E H
Tennyson D'Eyncourt
Engineer-in-Chief Engineer
Vice Admiral Sir Henry Oram
6.17-Engineer Rear Admiral George Goodwin Deputy Engineer-in-Chief Engineer
Rear Admiral George Goodwin
6.17-Engineer Rear Admiral E Gaudin Controller 5.17-6.18 5.17-Sir
Eric Geddes
7.17-Sir Alan Anderson Fourth Sea Lord & Chief of Supplies & Transport Rear
Admiral Cecil Lambert
12.16-Rear Admiral Lionel Halsey 7.17-Rear Admiral Hugh Tothill Director
Naval Equipment
Rear
Admiral Arthur Waymouth
12.14-Captain C Greatorex 10.17-Captain E Philpott Director Dockyards Sir
James Marshall
.17-Rear Admiral Laurence Power Three major home commands were: Nore Command Portsmouth Command Plymouth Command Commanded by very senior officers, each command had a range of functions: - A manning divisions of ratings, responsible for the recruiting, training, and manning of the fleet. - Training establishments for the instruction of ratings in a range of trades. - Dockyards and bases within each command provided the essential repair and maintenance of the fleet. - Local defence forces. During the war each of these commands was focused on their primary administrative and support role with comparatively limited activity in the conduct of naval operations. The Nore Command, in particular, would seem to be in an ideal position to control operations in the southern North Sea. Naval operations in its area, however, were allocated to forces which obtained their orders from either the Admiralty or the Grand Fleet. These included: the Dover Patrol, the Harwich Force, the Southern Forces, and the Patrol Forces. Plymouth Command had an increasing role in the war against the German submarines from mid-war onwards. In this task it was secondary to the role of the Irish command. Two major geographic commands existed in 1914. The major difference between them and the three traditional commands is that they were not involved in the tasks of manning and training. Their initial task was to support naval operations in their respective areas through the creation and operation of base and dockyard facilities. They were: Irish Coast Scottish Coast The Irish command, with its headquarters at Queenstown rapidly transformed into an active command as the threat from German submarines increased. By 1917, it assumed leadership of the anti-submarine war. The Scottish command - or Rosyth Command as it became - was responsible for the development of bases for the Grand Fleet in the Firth of Forth and at Cromarty. Of these the most important was the new dockyard at Rosyth which opened in 1916. The defence of those bases from the submarine and mine threats became more important as the ships of the Grand Fleet moved southwards. From April 1918 Rosyth was the main base of the Grand Fleet. The Orkneys and Shetlands Command was established at the outbreak of hostilities to establish and maintain the Grand Fleet's principal base at Scapa Flow. This included the local defence forces for the base. The Northern Patrol operated within this command but its relationship to this shore command is unclear. In fact, the relationship between the various shore commands and the operational forces, and between the components of the seagoing forces is not always clear. So each will be examined separately.
NORE
COMMAND
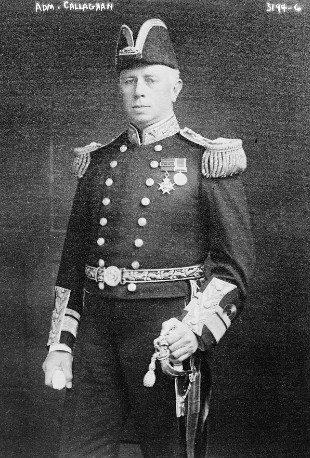
The original boundaries of the Nore Command extended from the eastern English Channel to the Tees. Before the war, the task of defending the east coast of England had been given to the Admiral of Patrols whose chain of command was to the Grand Fleet. After the outbreak of the war, further erosion came about with the establishment of the Southern Force, the Harwich Force, and the Dover Patrol. Effectively this meant that the command was a provider of shore support rather than a command with operational responsibilities. Commander-in-Chief Admiral
Sir Richard Poore
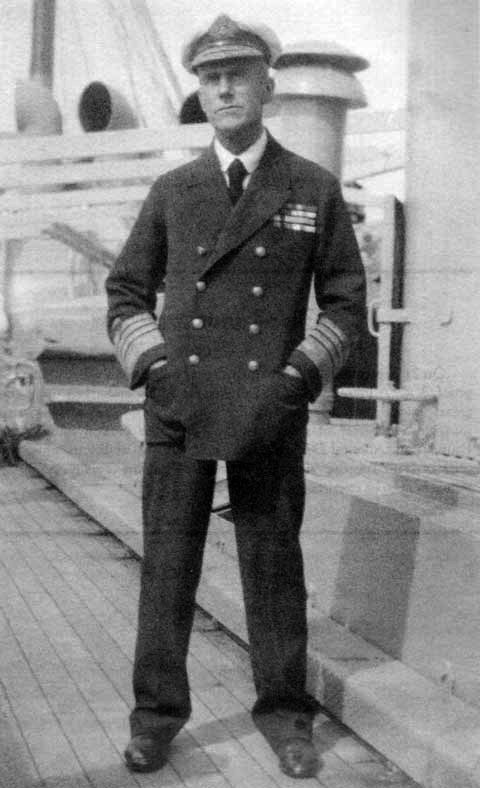
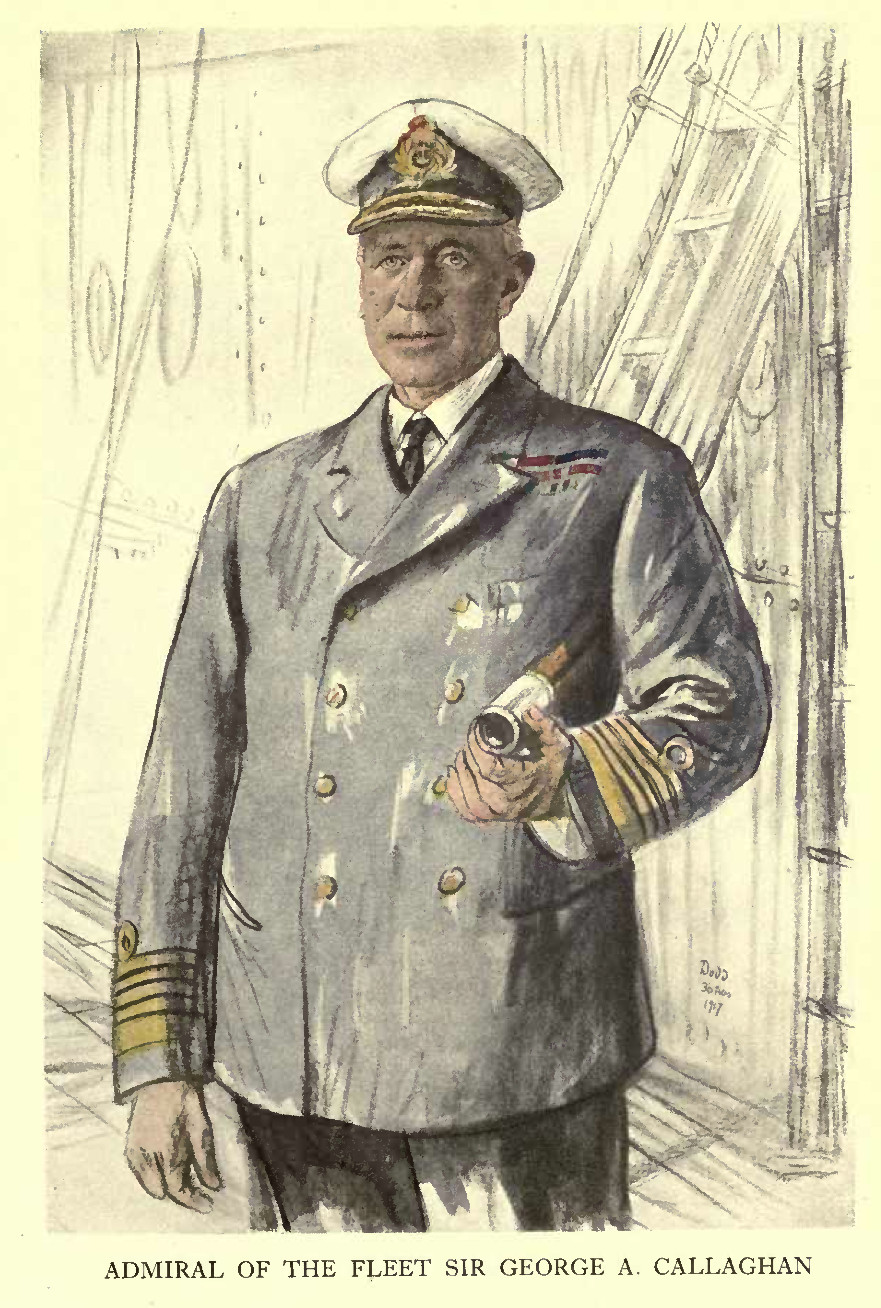
1.15-Admiral Sir George Callaghan 3.18-Admiral Sir Doveton Sturdee Commodore
RN Barracks, Chatham
Commodore E F Gaunt
8.15-Commodore S E Erskine 7.18-Commodore H Skipwith Admiral Superintendent, Chatham Dockyard Rear
Admiral Charles Anson
8.15-Rear Admiral Arthur Ricardo SNO Sheerness
Captain R
Prendergast
9.15-Captain Edmund Hyde-Smith SNO Harwich Captain G
Cayley [later Rear Admiral]
4.18-Rear Admiral Cecil Hickley [also Director of Training] In 1914, its main bases were Chatham Dockyard and Sheerness Dockyard with a range of training establishments. These were: HMS Pembroke
- Base and RNB Chatham
HMS Wildfire - Base at Sheerness HMS Actaeon - Torpedo School at Sheerness HMS Ganges - Boys training establishment at Shotley, near Harwich Battleship HMS Vengeance was attached as gunnery training ship. In active commission were 12 torpedo boat destroyers and 20 torpedo boats on local defence duties. The local defence flotilla (LDF) was operational throughout the war. The administrative division of the pre-war Second and Third Fleets placed 6 battleships, 12 cruisers and 2 minelayers under its jurisdiction - they were mobilised in July 1914. During the war, the following were allocated to the command: 5th
Submarine Flotilla, Sheerness 8.14-retitled 4th
Submarine Flotilla 8.16 and disbanded 9.17
3rd Battle Squadron, ex Grand Fleet 5.16-disbanded 4.18
PORTSMOUTH COMMAND
Responsible for the central part of the English Channel across which many of the BEF's supply lines extended.
Commander-in-Chief
Admiral Sir
Hedworth Meux
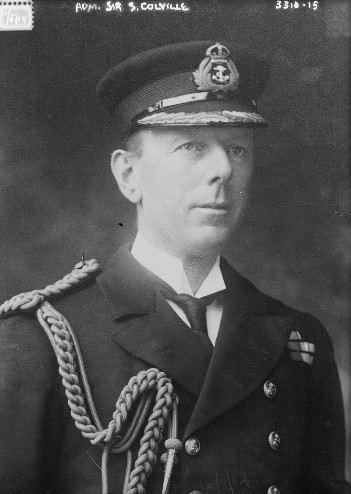
2.16-Admiral Sir Stanley Colville Commodore
RN Barracks, Portsmouth
Commodore
C Vaughan Lee
12.14-Commodore J Eustace 6.16-Commodore H Pelly 11.18-Commodore A G Smith Admiral Superintendent, Portsmouth Dockyard Rear
Admiral Herbert Heath
8.15-Rear Admiral Arthur Waymouth 1.17-Rear Admiral C Vaughan Lee SNO Portland Captain J
R Bridson
2.15-Captain F Ryan 9.16-Captain R Harbord 11.17-Rear Admiral Vivian Bernard In 1914 its main assets were the base and dockyard at Portsmouth, several training establishments at Portsmouth, and the base and smaller dockyard at Portland. The establishments were: HMS Victory
- HQ, base and RN Barracks, Portsmouth
HMS Excellent - gunnery school, Whale Island HMS Vernon - torpedo school HMS Fisgard - mechanical engineering school HMS Dolphin - submarine school Navigation School Several warships were attached as tenders to these establishments. Local defence forces consisted of 10 torpedo boat destroyers, 18 torpedo boats, and 4 submarines. The LDF remained operational throughout the war. In addition, the command administered 4 battleships, 9 cruisers, and 3 minelayers on behalf of the Second and Third Fleets until July 1914. The following flotillas served with the command during the war. They were: Portsmouth
Escort Flotilla 1.16-retitled 1st Destroyer Flotilla
1.18-1.19
1st Destroyer Flotilla, 4.17-1.18 4th Destroyer Flotilla, 12.16-3.17 part 5th Destroyer Flotilla, 11.14-4.15 2nd Submarine Flotilla 8.14- retitled 6th Submarine Flotilla 8.16-11.18 9th Minesweeper Flotilla pre 6.18-
PLYMOUTH COMMAND
Responsible for the western channel and Bristol Channel, the command became heavily involved in the war against the German submarines, especially 1917-1918. Its role in that task will be assessed in the later section on the submarine war.
Commander-in-Chief
Admiral Sir
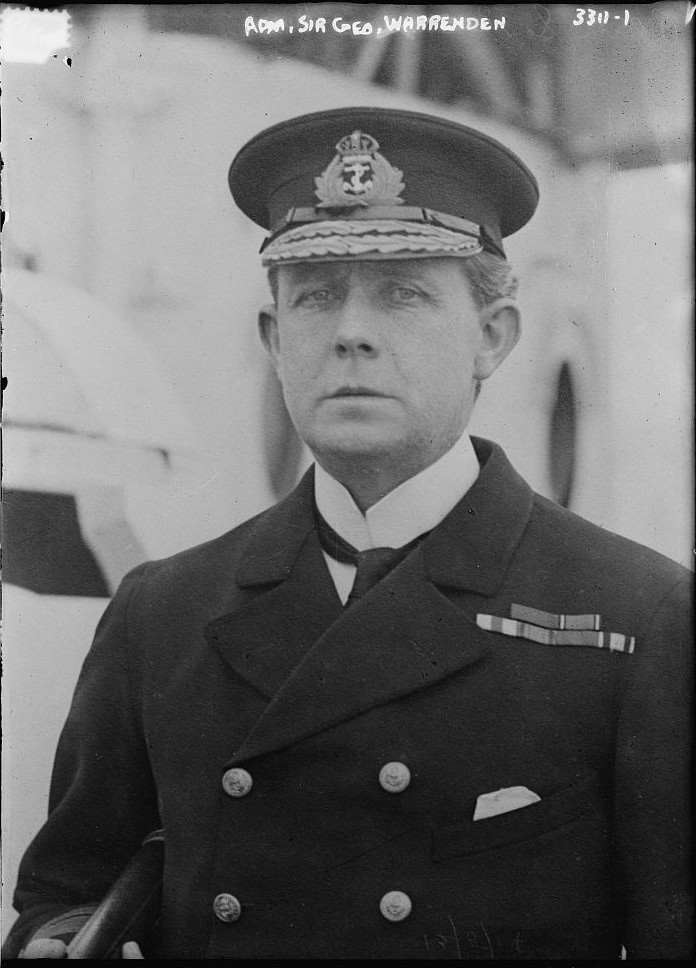
George Egerton
3.16-Admiral Sir George Warrender 9.16-Admiral Sir Alexander Bethell 9.18-Admiral Sir Cecil Thursby Commodore RN Barracks, Devonport Commodore D
J Sheppard
12.14-Commodore J Hutchison 1.17-Rear Admiral Charles Corbett Admiral Superintendent Devonport Dockyard Rear
Admiral Godfrey Mundy
12.16-Rear Admiral Arthur Heniker-Hughan The principal asset of this command was the naval base and dockyard at Devonport, with the much smaller and secondary dockyard at Pembroke. A number of training establishments with seagoing tenders attached were in service in 1914. They were: HMS Vivid -
Flag, base and RNB Devonport
HMS Defiance - Torpedo training school HMS Indus - Mechanical training school HMS Impregnable - boys training HMS Powerful - attached to HMS Impregnable Battleship HMS Exmouth was attached for gunnery training. Local defence forces consisted of 3 torpedo boat destroyers, 6 torpedo boats, and 2 submarines at Devonport, and 4 torpedo boats at Pembroke. The local defence flotilla remained active until 1918. The command administered 10 battleships, and 11 cruisers at Devonport, and 4 battleships at Pembroke under the pre-war fleet structure until July 1914. During the war, the following flotillas operated within the command: 2nd
Destroyer Flotilla, 4.16-9.17*
4th Destroyer Flotilla, 3.17-11.18* 1st Submarine Flotilla 8.14-2.16 Ambrose Submarine Flotilla 1918* 15th Minesweeping Flotilla 1918 [at Falmouth] 18th Minesweeping Flotilla 1918 *
for anti-submarine operations - see later section.
IRISH COAST COMMAND
With headquarters at HMS Colleen, Queenstown, this relatively minor peacetime command grew to become responsible for anti-submarine operations in the Western Approaches, Irish Sea, and Irish Coast. By 1918, it included a substantial US Navy component to protect the convoys bringing American troops to Europe.
Commander-in-Chief
Vice Admiral
Sir Charles Coke
7.15-Vice Admiral Sir Lewis Bayly SNO South Irish Coast 6.15-Rear
Admiral John Elliott- .18?
SNO North Irish Coast 5.17-Vice
Admiral F S Miller
Flag Officer, Milford Haven
2.15-Admiral [ret] Charles Dare
Apart from a small dockyard at Haulbowline, there were no major shore facilities in 1914. The command relied on docks and facilities in Great Britain for repairs and maintenance. Equally there were no major manning depots or training establishments. In 1914, the base at Queenstown hosted the recently formed Training Squadron composed of 8 cruisers of the Edgar class. All left for the Northern Patrol in August 1914. This left 4 torpedo boats for local defence at Queenstown. Small groups of destroyers were assigned to patrol duties in various ports on either side of the Irish Sea. But, it was not until 1916, that major flotillas began to arrive, They were: 2nd Destroyer Flotilla, Londonderry 11.17-2.19 Platypus (depot ship) Submarine Flotilla 1917- Vulcan (depot ship) Submarine Flotilla 1917- 1st Sloop Flotilla, Queenstown 1917- 2nd Sloop Flotilla, Londonderry 1918- 8th Minesweeping Flotilla, Queenstown 1918 11th Minesweeping Flotilla, Liverpool 1918 16th Minesweeping Flotilla, Kingstown 1918 19th Minesweeping Flotilla, Swansea 1918
SCOTTISH COAST COMMAND
Establishment of this command began in 1913 in anticipation of the opening of the dockyard at Rosyth - which did not happen until 1916. The main purpose of the command was the provision of the required infrastructure to support the fleet in northern waters. In addition, it provided for local defence from the Moray Firth to the Tyne. As a new organisation it did not have either shore establishments or a local defence flotilla in 1914.
Commander-in-Chief
Vice Admiral
Sir Robert Lowry
6.15-Admiral Sir Frederick Hamilton [died 10.17] 13.10.17-Admiral Sir Cecil Burney Admiral Superintendent, Rosyth Dockyard 5.15-Rear
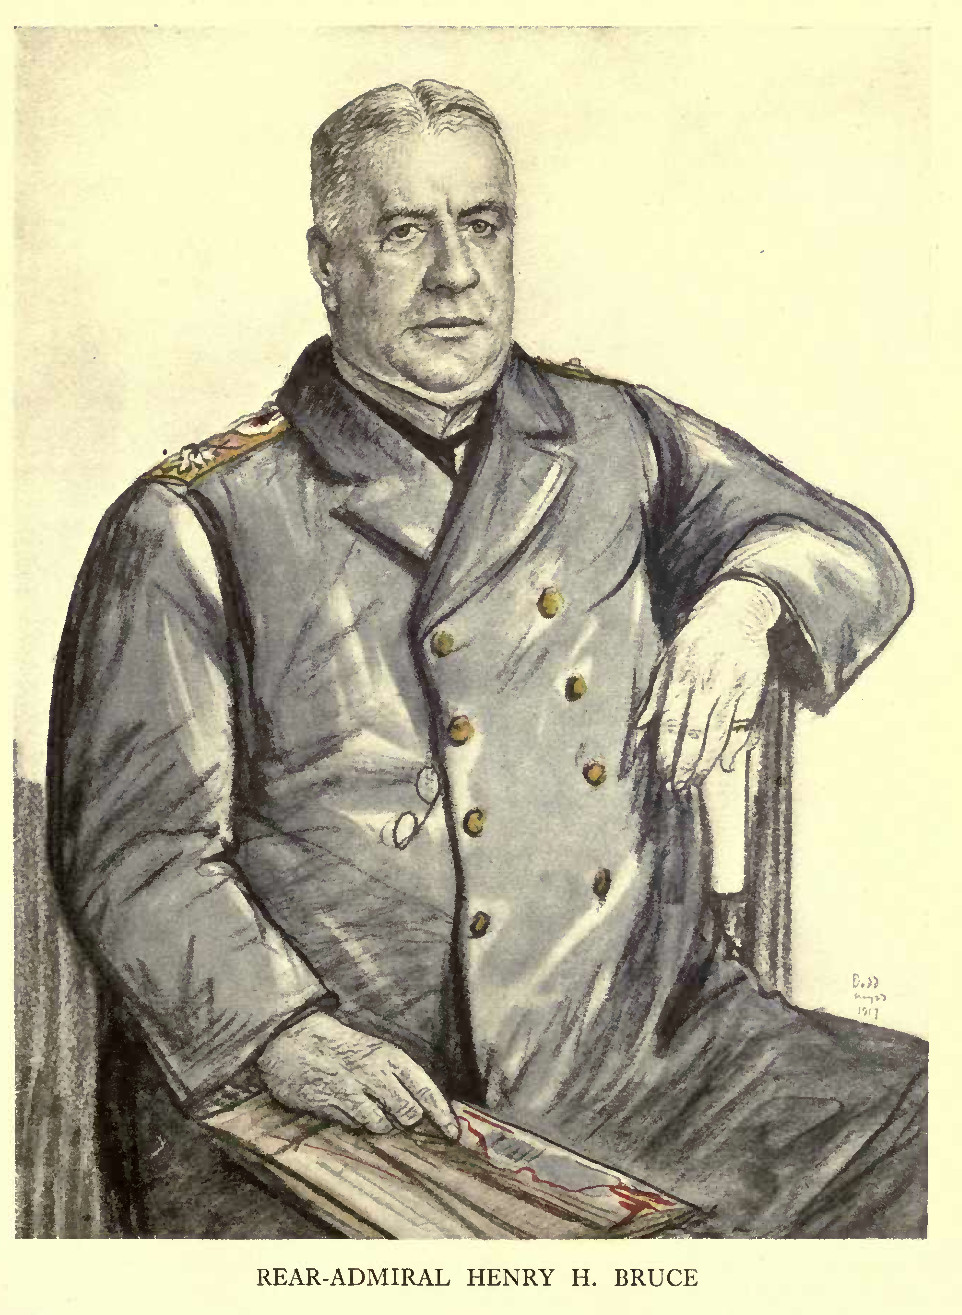
Admiral Henry Bruce
Flag Officer, West Coast of Scotland-3.15 Rear
Admiral Reginald Tupper
Flag Officer, Stornoway 3.16-Rear
Admiral Robert Boyle
Flag Officer. Cromarty 8.14-Rear
Admiral Edmund Pears
During the course of the war, the construction of the dockyard at Rosyth was finished, a major base for destroyers was built at Port Edgar, and extensive repair facilities created at Invergordon. From 1915 substantial elements of the Grand Fleet were based in the Firth of Forth which became the main base for the fleet on 12th April 1918. The forces allocated to the command contained a mixture of those needed for support of the Grand Fleet, and those to provide the northern wing of the Admiral of Patrols domain. They included: 8th Destroyer
Flotilla 8.14- .17
9th Destoyer Flotilla, Tyne 8.14-1917 Methil Convoy Flotilla 1918 7th Submarine Flotilla 8.16-retitled 1st Submarine Flotilla until disbanded 3.18 10th Submarine Flotilla, Tyne .14-retitled 3rd Submarine Flotilla 8.16-3.17 3rd Sloop Flotilla, Dundee 1918 12th Minesweeper Flotilla, Granton 1918 16th Minesweeper Flotilla, Granton 1918 On the west coast of Scotland, there were: 9th
Submarine Flotilla 8.14- retitled 3rd Submarine Flotilla
8.16-1.17
13th Minesweeper Flotilla, Oban 1918 14th Minesweeper Flotilla, Oban 1918 ORKNEYS & SHETLANDS COMMAND Established in August 1914 with the sole purposes of creating, operating and defending the fleet base at Scapa Flow. Apart from the Grand Fleet, the ships of the Northern Patrol were based here. Commander in
Chief
8.14-Vice
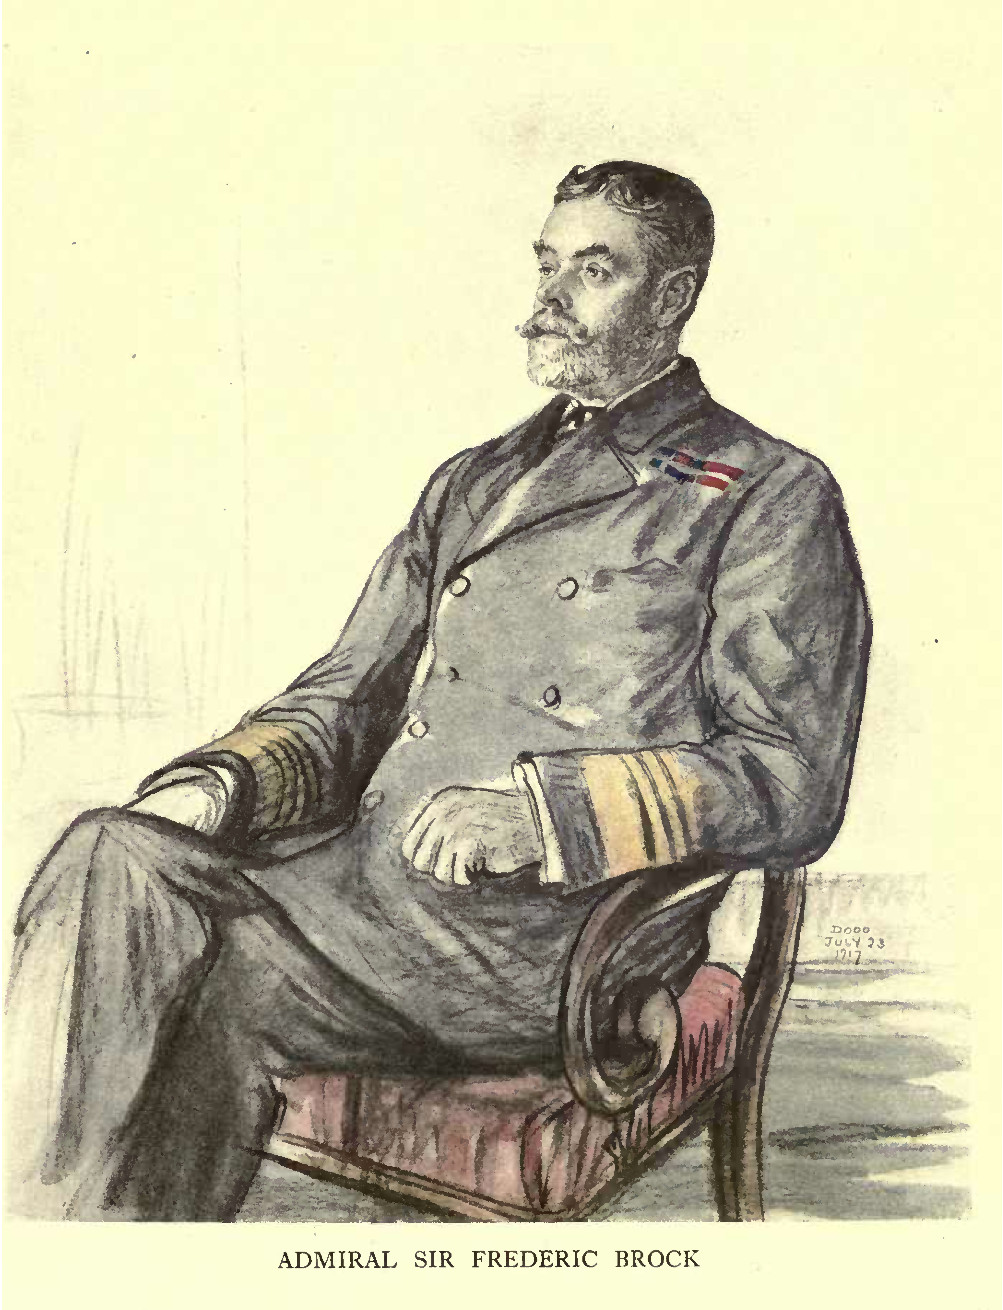
Admiral Stanley Colville
2.16-Vice Admiral Frederick Brock 1.18-Vice Admiral Herbert King-Hall SNO Scapa
Rear
Admiral F S Miller
5.16-Rear Admiral Robert Prendergast FO Shetlands 10.17-Rear
Admiral Clement Greatorex
As with Rosyth, it is sometimes difficult to establish which flotillas and ships operated under the Orkneys and Shetlands Command, as opposed to the Grand Fleet or the Northern Patrol. The following seem more likely than not to be base forces: Scapa Local
Defence Flotilla 1914-1918
21st Minesweeper Flotilla 1918 The 1st, 2nd and 3rd Minesweeper Flotillas were listed as an integral part of the Grand Fleet. 4. NAVAL OPERATIONS IN HOME WATERS A number of tasks faced the Royal Navy in Home Waters 1914-1918 which required a number of different types of commands, fleets, squadrons and flotillas. Often these tasks overlapped in the sense that the same formation could contribute to operations in pursuit of that task. The tasks were: Fleet Action
- the need to bring the German High Seas Fleet into
battle. Victory would free resources for other
operations. Until this was achieved a very large fleet -
the Grand Fleet
- had to be maintained in readiness for battle. It
required a smaller, more agile, component of the Grand
Fleet in the southern North Sea for observation duty -
this was the Harwich
Force.
Blockade - the exits from the North Sea via northern waters, and the English Channel, had to be controlled. This would deny Germany imports of raw materials, food, and militarily useful goods, and so cripple its economy. This required a substantial force of cruisers - the Northern Patrol. Later, the Northern Mine Barrage was created in 1917-1918. Support for the British Expeditionary Force in France and Flanders. Protection of the cross-channel sea-routes from attack by German surface vessels and submarines was the principal task of the Dover Patrol. Added to this was the coastal bombardment of German positions in Flanders. German invasion of eastern England. A possibility which needed the Patrol Flotillas with their destroyers and submarines to act as the first line of defence. Trade protection became of crucial importance as evidence of the German submarine threat became more apparent. This brought about a substantial increase in the numbers of destroyers and sloops, and aircraft, especially in the Western Approaches. Freedom of movement on the surface required a very considerable effort to cope with the menace of the mine. Mines were used for offensive purposes in the North Sea to restrict the movement of German ships and submarines. There was no overall naval commander for warfare in Home Waters. The allocation of resources, and the co-ordination of operations was the main task of the Admiralty. The following notes will deal with each of the major elements of British naval power in Home Waters, beginning with the Grand Fleet. A resume of those major elements in 1914 will set the scene for a more detailed examination. Summary
of Naval Strength in Home Waters, August 1914
THE
HOME FLEETS
First
Fleet [ships
in full commission] [one dreadnought as fleet
flagship]
1st Battle Squadron [8 dreadnoughts] 2nd Battle Squadron [8 dreadnoughts] 3rd Battle Squadron [8 pre-dreadnoughts] 4th Battle Squadron [3 dreadnoughts/1 pre-dreadnoughts] * forming 1st Battle-Cruiser Squadron [4 battlecruisers] 2nd Cruiser Squadron [4 armoured cruisers] 3rd Cruiser Squadron [4 armoured cruisers] 1st Light Cruiser Squadron [4 light cruisers] 1st Destroyer Flotilla [1 scout cruiser, 20 destroyers] 2nd Destroyer Flotilla [1 scout cruiser, 20 destroyers] 3rd Destroyer Flotilla [1 scout cruiser, 15 destroyers] * forming 4th Destroyer Flotilla [1 destroyer leader, 20 destroyers] 5 minesweeping gunboats Second Fleet [reduced complements] 5th Battle Squadron [9 pre-dreadnoughts] 6th Battle Squadron [6 pre-dreadnoughts] 5 armoured cruisers, 1 light cruiser [for 5th & 6th CS's] Minelaying Squadron [7 ships] Third Fleet [in reserve] 7th Battle Squadron [8 pre-dreadnoughts] 8th Battle Squadron [6 pre-dreadnoughts] 7th Cruiser Squadron [5 armoured cruisers] 9th Cruiser Squadron [8 armoured/protected cruisers] 10th Cruiser Squadron [7 protected cruisers] -from Training Squadron at Queenstown 11th Cruiser Squadron [5 protected cruisers] 12th Cruiser Squadron [4 protected cruisers] Admiral of Patrols 6th Destroyer Flotilla [3 scout cruisers, 22 destroyers] 7th Destroyer Flotilla [1 scout cruiser, 21 destroyers, 12 torpedo boats] 8th Destroyer Flotilla [1 scout cruiser, 12 destroyers, 12 torpedo boats] 9th Destroyer Flotilla [2 scout cruisers, 16 destroyers] plus 8 destroyers detached to CinC Home Fleets 4th Submarine Flotilla [7 boats] 5th Submarine Flotilla [6 boats] 6th Submarine Flotilla [6 boats] 7th Submarine Flotilla [12 boats] 8th Submarine Flotilla [13 boats] 9th Submarine Flotilla [3 boats] The
Home Fleets were distributed in accordance with
Admiralty Fleet Order dated 8th August 1914
The
Grand Fleet
1st Battle Squadron 2nd Battle Squadron 3rd Battle Squadron [included 3 pre-dreadnoughts from disbanded 6BS] 4th Battle Squadron 1st Battle-Cruiser Squadron 2nd Cruiser Squadron 3rd Cruiser Squadron 1st Light Cruiser Squadron 2nd Destroyer Flotilla [Acorn/H class] 4th Destroyer Flotilla [Acasta/K class] Cruiser Force B [Northern Patrol] 6th Cruiser Squadron 10th Cruiser Squadron Harwich Flotillas 1st Destroyer Flotilla [Acheron/I class] 3rd Destroyer Flotilla [L class] Cruiser Force C [ex 7CS], Southern North Sea Dover Patrol 6th Destroyer Flotilla [Tribal & 30kts tbd] 3rd & 4th Submarine Flotillas Minelayer Squadron Cruiser Force E - 11th Cruiser Squadron [Irish Sea] The
Channel Fleet
5th Battle Squadron 8th Battle Squadron [amalgamation of 7BS & original 8BS] Cruiser Force G - 12th Cruiser Squadron Patrol Flotillas 7th
Destroyer Flotilla, Humber
8th Destroyer Flotilla, Forth 9th Destroyer Flotilla, Tyne 5th Submarine Flotilla, Harwich 6th Submarine Flotilla, Grimsby 7th Submarine Flotilla, Forth 8th Submarine Flotilla, Harwich A series of Cruiser Forces are listed 5th August 1914 but some are not included in above list. They were: Cruiser Force A - 1BCS, 2CS, 3CS, 6CS, 1LCS [the Grand Fleet] Cruiser Force B - 10CS [Northern Patrol] Cruiser Force C - 7 CS [North Sea] Cruiser Force D - 5 CS [Atlantic] Cruiser Force E - 11 CS [Irish Sea] Cruiser Force F - 2, ex-7CS Cruiser Force G - 12 CS [Western Channel] Cruiser Force H - ? [Atlantic] Cruiser Force I - 9 CS [Gibraltar] THE GRAND FLEET (GF) The principal battle fleet assembled for operations with a new name and a new commander. The First Fleet became the Grand Fleet and Admiral Sir John Jellicoe succeeded Admiral Sir George Callaghan (below), four months before the latter's tenure was due to end.
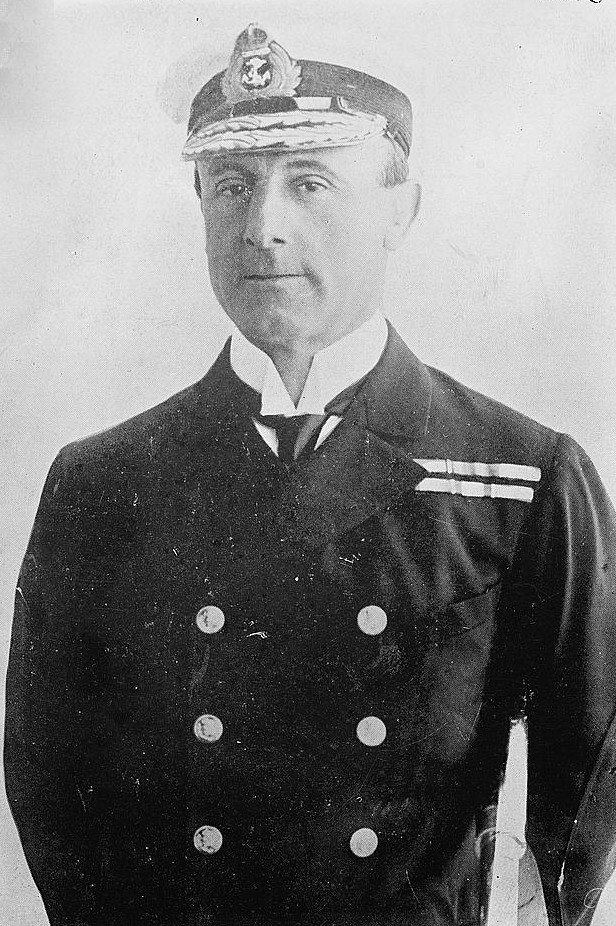
Commander-in-Chief
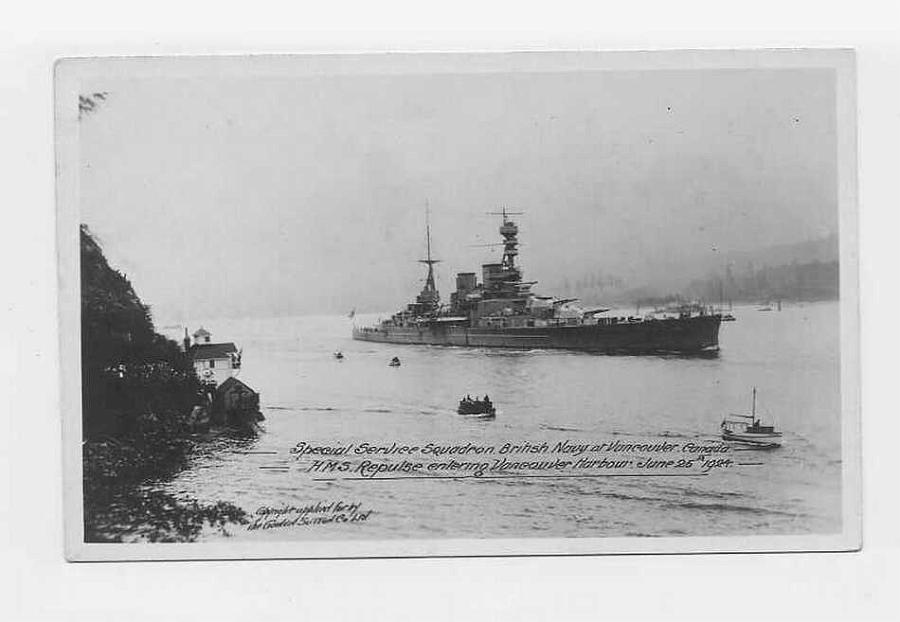
02.08.14-Admiral Sir John Jellicoe [Flag in HMS Iron
Duke] ("Grand
Fleet 1914-1916" by Adm Jellicoe)
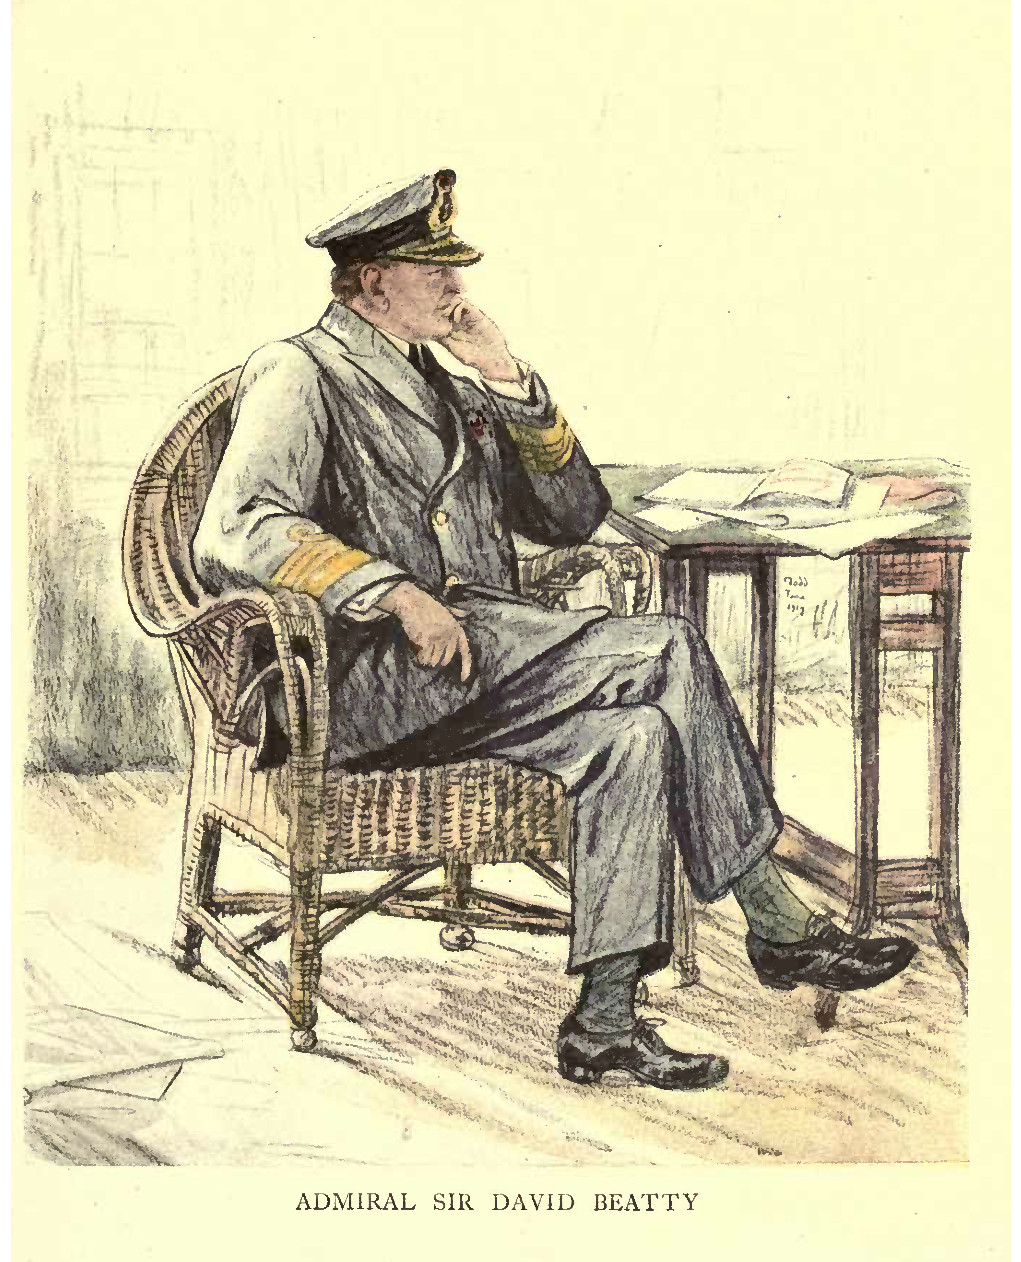
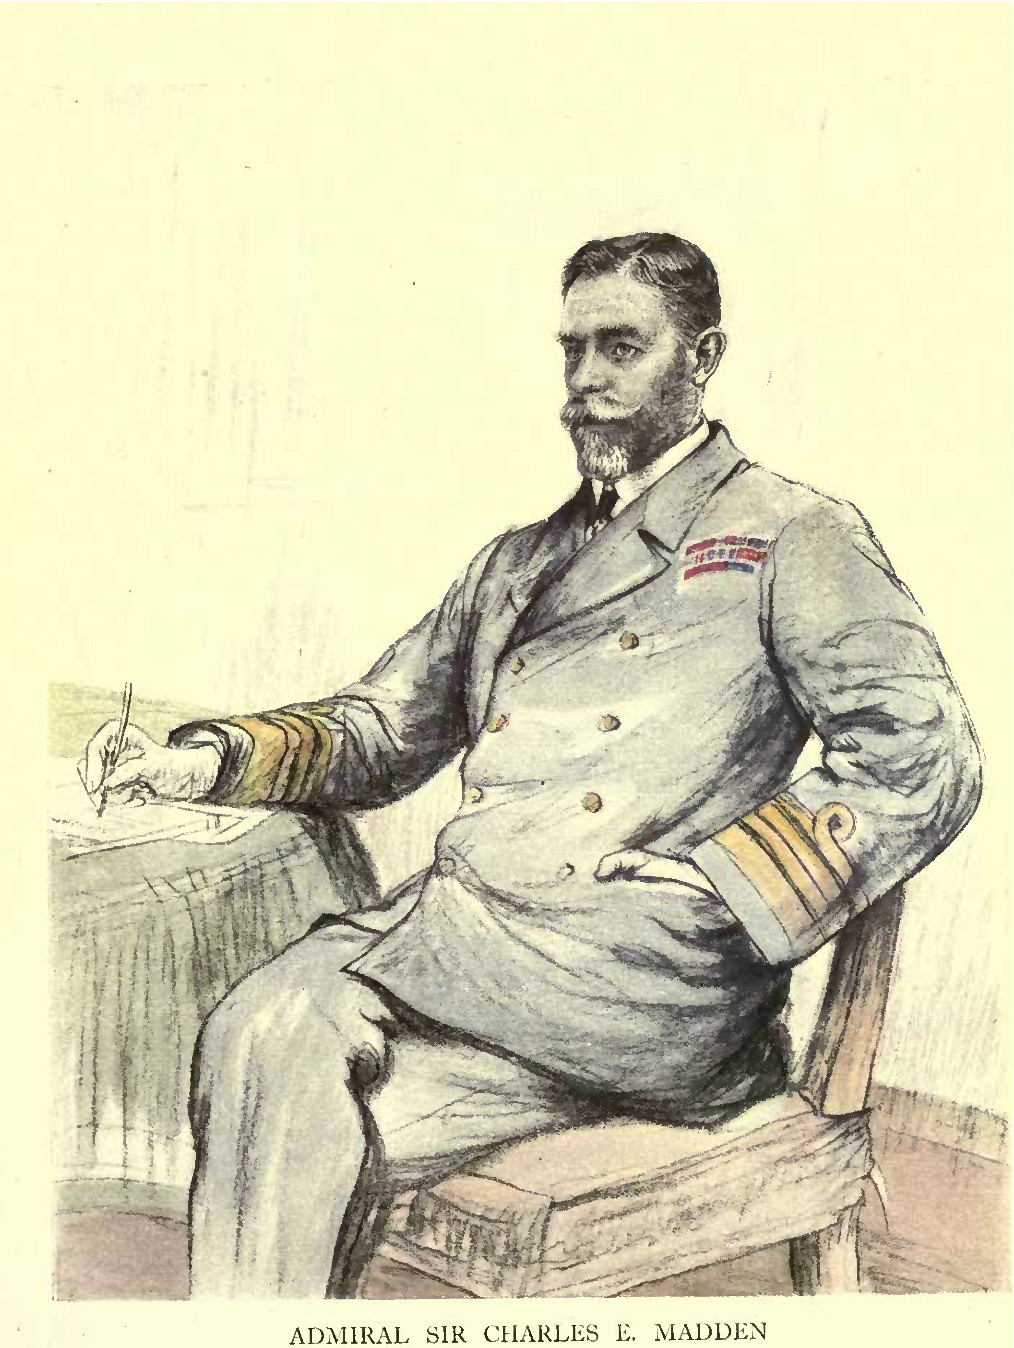
27.11.16-Admiral Sir David Beatty [Flag transferred to HMS Queen Elizabeth 2.17] Chief of Staff 08.14-Rear
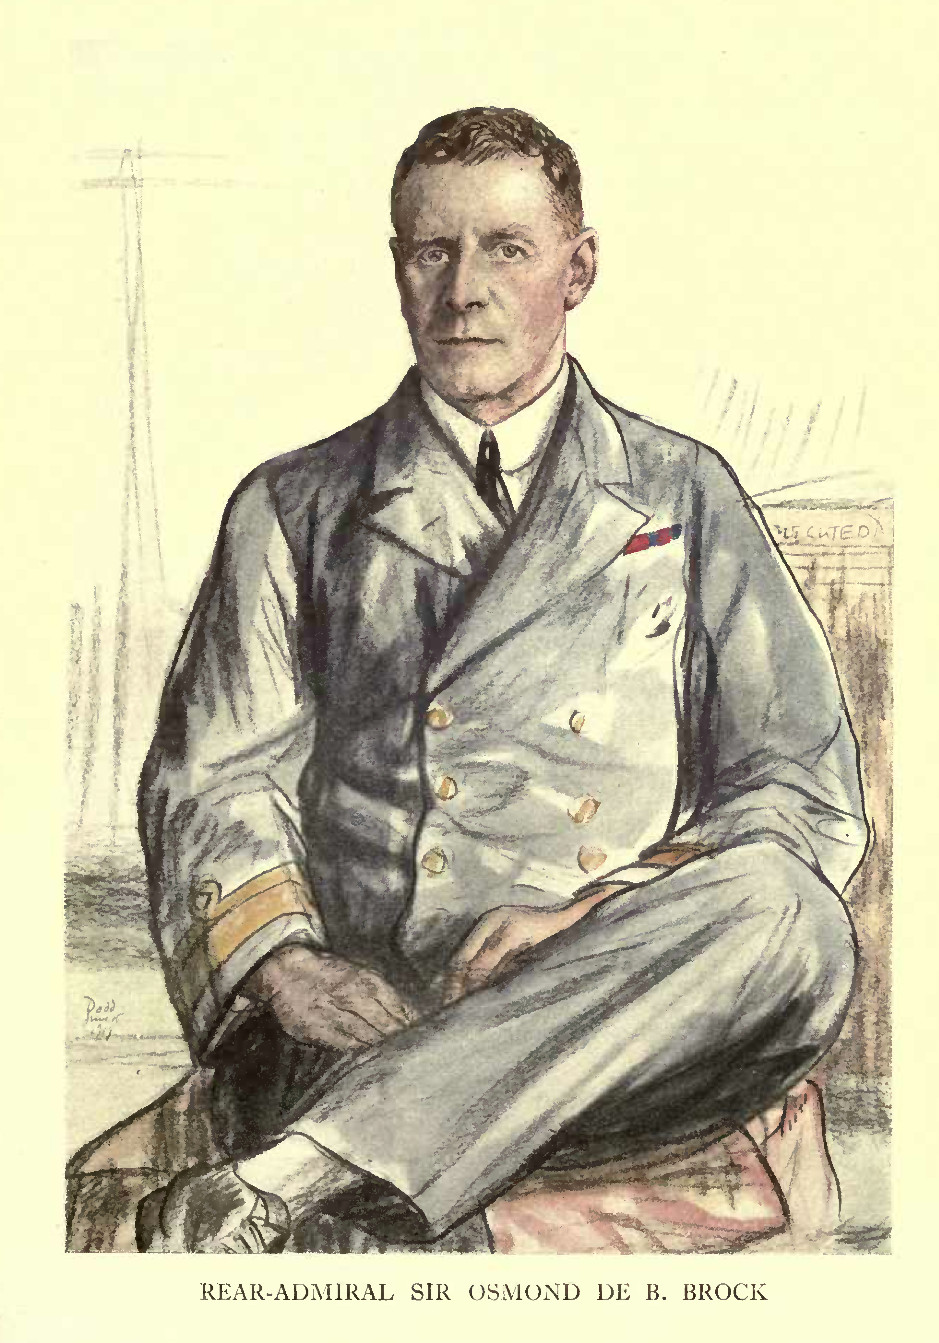
Admiral Charles Madden
11.16-Rear Admiral Osmond de B Brock
The fleet's main base was at Scapa Flow until 20th April 1918 when it moved to Rosyth. The pressure to move south was largely due to the need to be closer to both the east coast and to the German fleet bases. Until Rosyth was ready in terms of facilities and defences, the fleet remained in the Orkneys with two exceptions - the early move of 3rd Battle Squadron and 3rd Cruiser Squadron during August 1914, and the subsequent movement of the battle-cruisers there at the end of 1914. The fleet retained a hierarchy of battle squadrons, cruiser squadrons, and destroyer flotillas throughout the conflict. From 1917 it included submarines flotillas, and then a 'flying' squadron. In June 1916, there was a major re-organisation of the battle and cruiser squadrons. The number of destroyer flotillas increased from three to seven by 1918.
The battle squadrons were: 1st Battle Squadron
In June 1916 the ships of the 1st Battle
Squadron were transferred to the 4th Battle Squadron:
and the ships of the 4th Battle Squadron became the 1st
Battle Squadron.
2nd
Battle Squadron
The
composition of this squadron remained fairly constant
throughout the war.
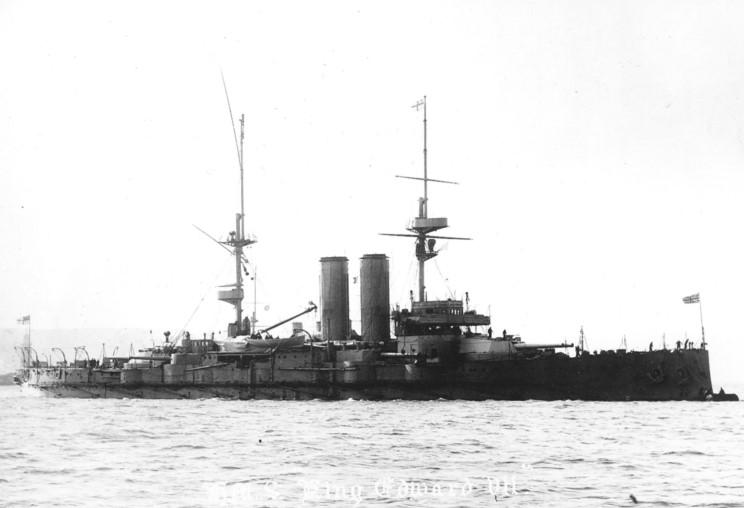
3rd Battle Squadron-29.4.16 Composed of the pre-dreadnoughts of the King Edward VII class, this squadron was stationed in the Forth for most of its time with the Grand Fleet. In April 1916 it moved to Sheerness and became an independent command until disbanded in April 1918.
4th Battle Squadron This squadron was not at full strength at the outbreak of the war. It was planned to reach full strength and be deployed to Gibraltar/Malta in 1915. The ships of the squadron were transferred to 1st Battle Squadron in 6.16 and replaced by ships from that squadron.
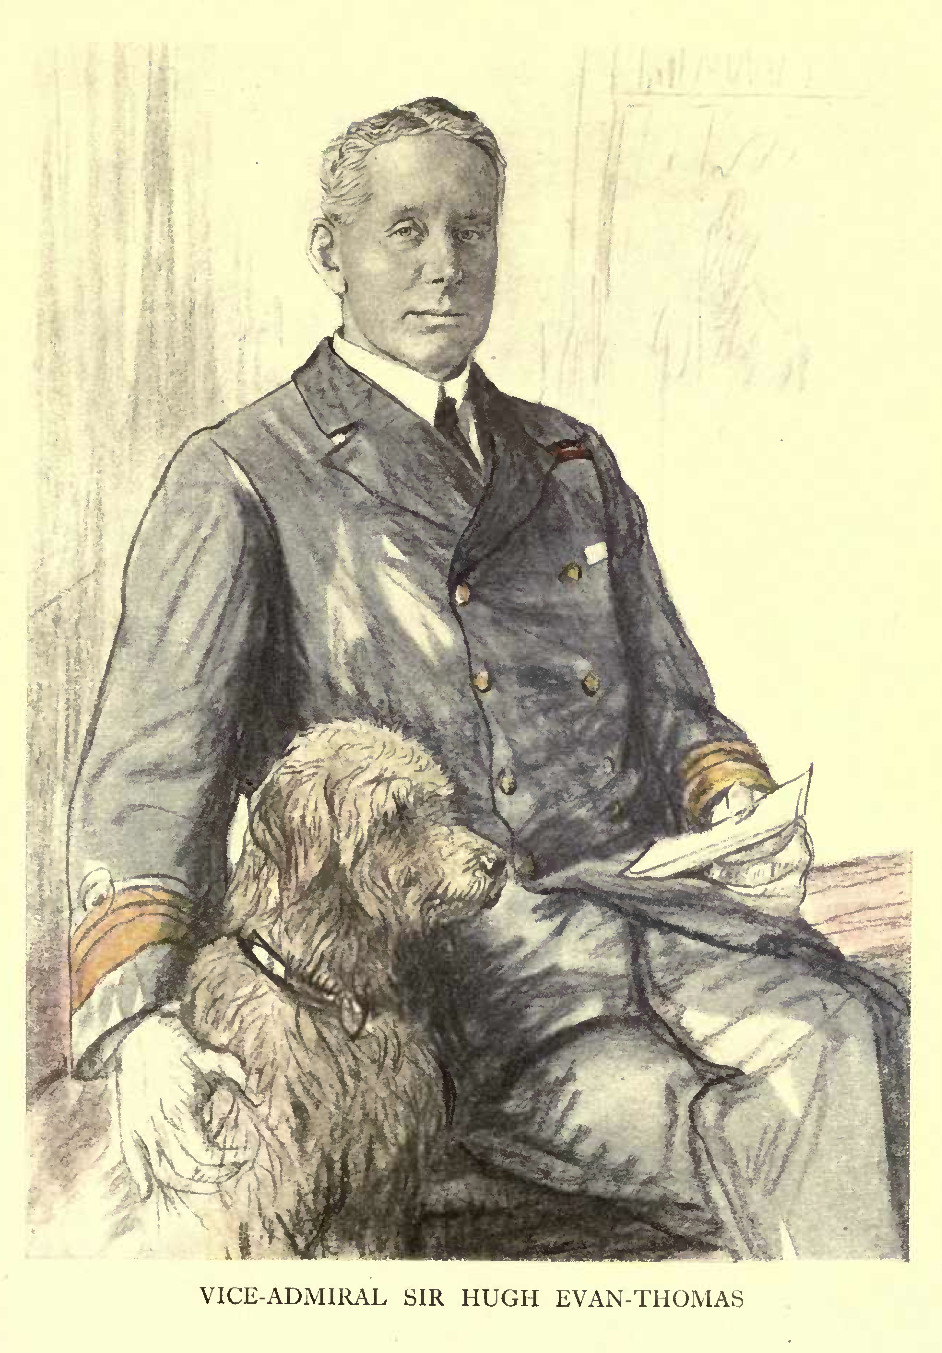
5th Battle Squadron Composed of the new Queen Elizabeth class as a 'fast wing'. 5BS was never a full strength squadron. 10.15-Rear
Admiral Hugh Evan-Thomas
10.18-Rear Admiral Harold Leveson Composition 3.15-Warspite 5.15-Queen Elizabeth 2.17 to Fleet Flagship 10.15-Barham [F] 2.16-Malaya 2.16-Valiant 6th Battle Squadron Rear
Admiral Stuart Nicholson
The 6th Battle Squadron was disbanded in August 1914 and the following three ships were transferred to Grand Fleet and attached to the 3rd Battle Squadron. Albemarle
-1.16 to Archangel
Exmouth -5.15 to Med. Russell -11.15 to Med.
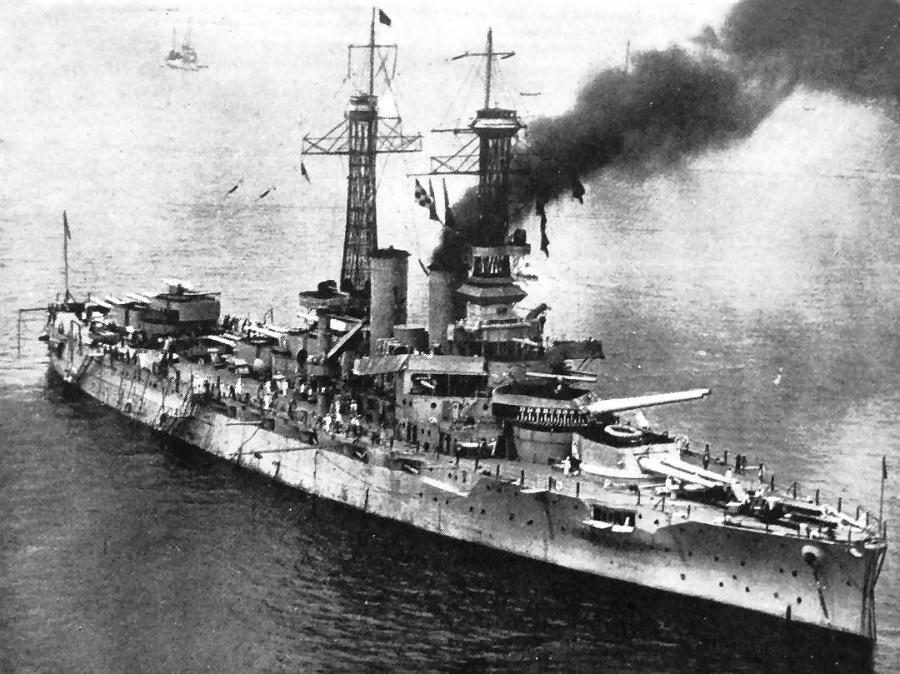
6th Battle Squadron (USN) 1917-1918 In December 1917 a squadron of United States Navy battleships joined the Grand Fleet, and for tactical purposes, they were designated as the 6th Battle Squadron. Rear
Admiral Hugh Rodman USN
USS New York [F] USS Wyoming USS Arkansas USS Florida USS Texas A further
division of USN battleships arrived in European waters
in the autumn of 1918. Stationed at Berehaven, they were
never part of the Grand Fleet.
USS Utah
USS Oklahoma USS Nevada The Grand Fleet battle squadrons had one scout cruiser attached to each of them. Its purpose was either to repeat signals from the flagship, or retrieve the squadron commander from a damaged or sinking flagship. When the Force moved to the Forth at the beginning of 1915 it was described as the 'Battle-Cruiser Fleet'. This description remained current throughout the remainder of the war, even though it was officially subordinate to the CinC Grand Fleet. The use of the term was perhaps justified because it included three battle-cruiser squadrons from the beginnning of 1915 until the battle of Jutland on 31st May 1916. In the post-battle re-organisation of the Grand Fleet, its was reduced to two battle-cruiser squadrons.
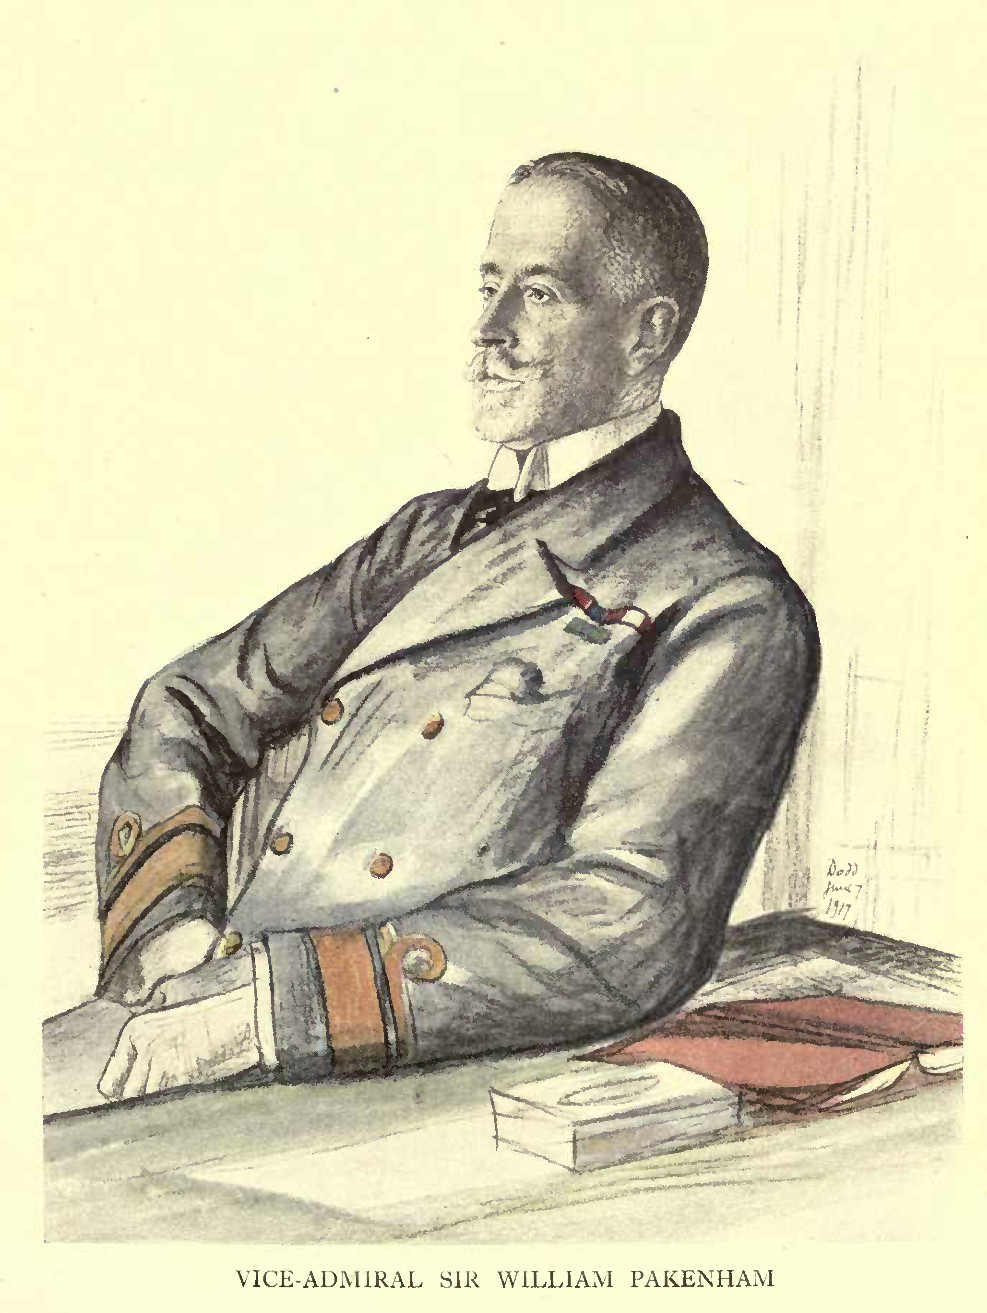
Battle-Cruiser
Force/Fleet Commander
8.14-Vice
Admiral David Beatty [and Cmdr 1BCS 8.14-2.15]
12.16-Rear Admiral William Pakenham 12.18-Rear Admiral Henry Oliver Force/Fleet
Flagship:
Lion
Organisation
1914-6.1916
Organisation
6.16-11.18
* also Rear
Admiral Aircraft Carriers 1.17-11.18 [an independent
command from 3.18]
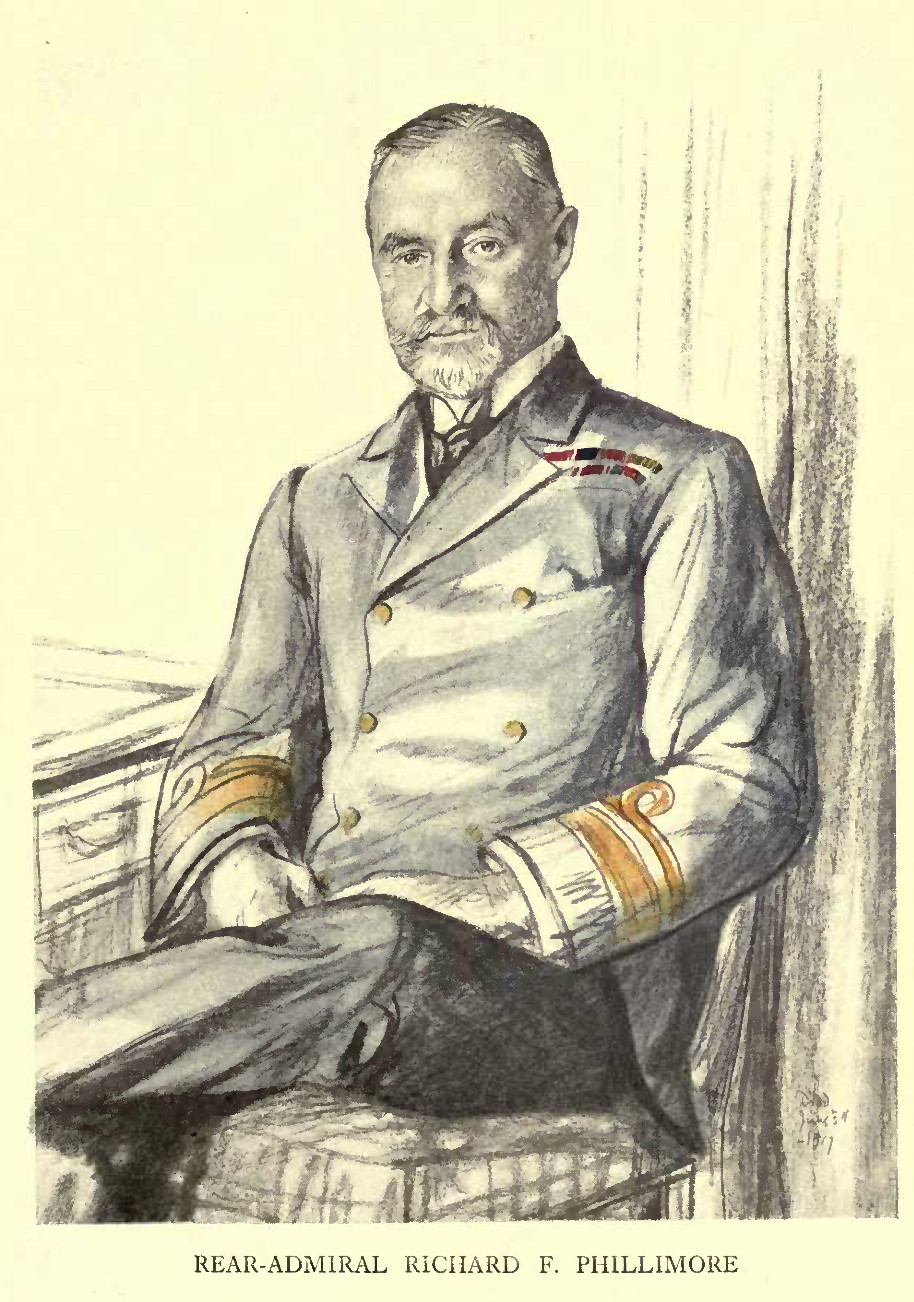
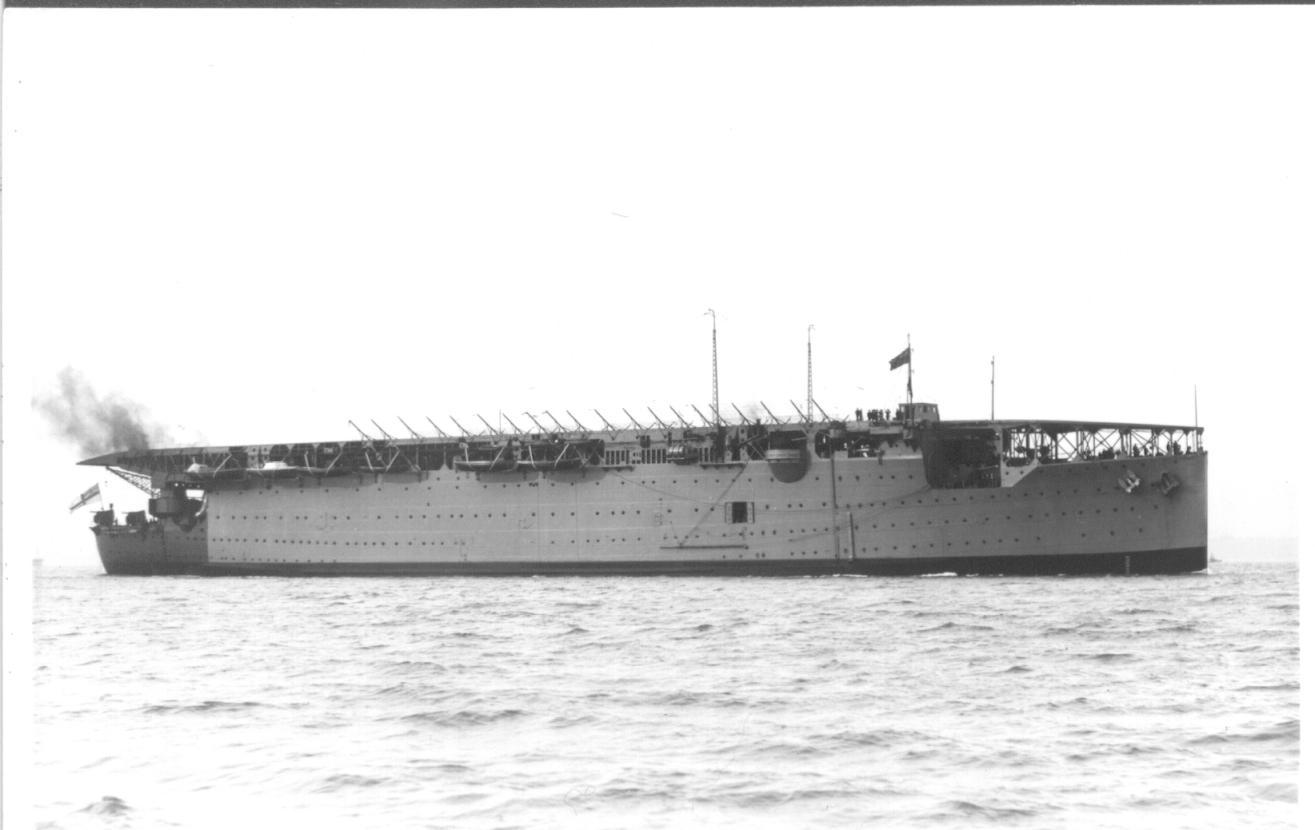
An aviation element was present in the Grand Fleet from 10.15; and 'Flying Squadron' under Rear Admiral Richard Phillimore was formed in 3.18. It consisted of- Campania
[lost 5.11.18],
Furious, Vindictive, Argus.
1st Cruiser Squadron 12.14-Rear
Admiral Archibald Moore;
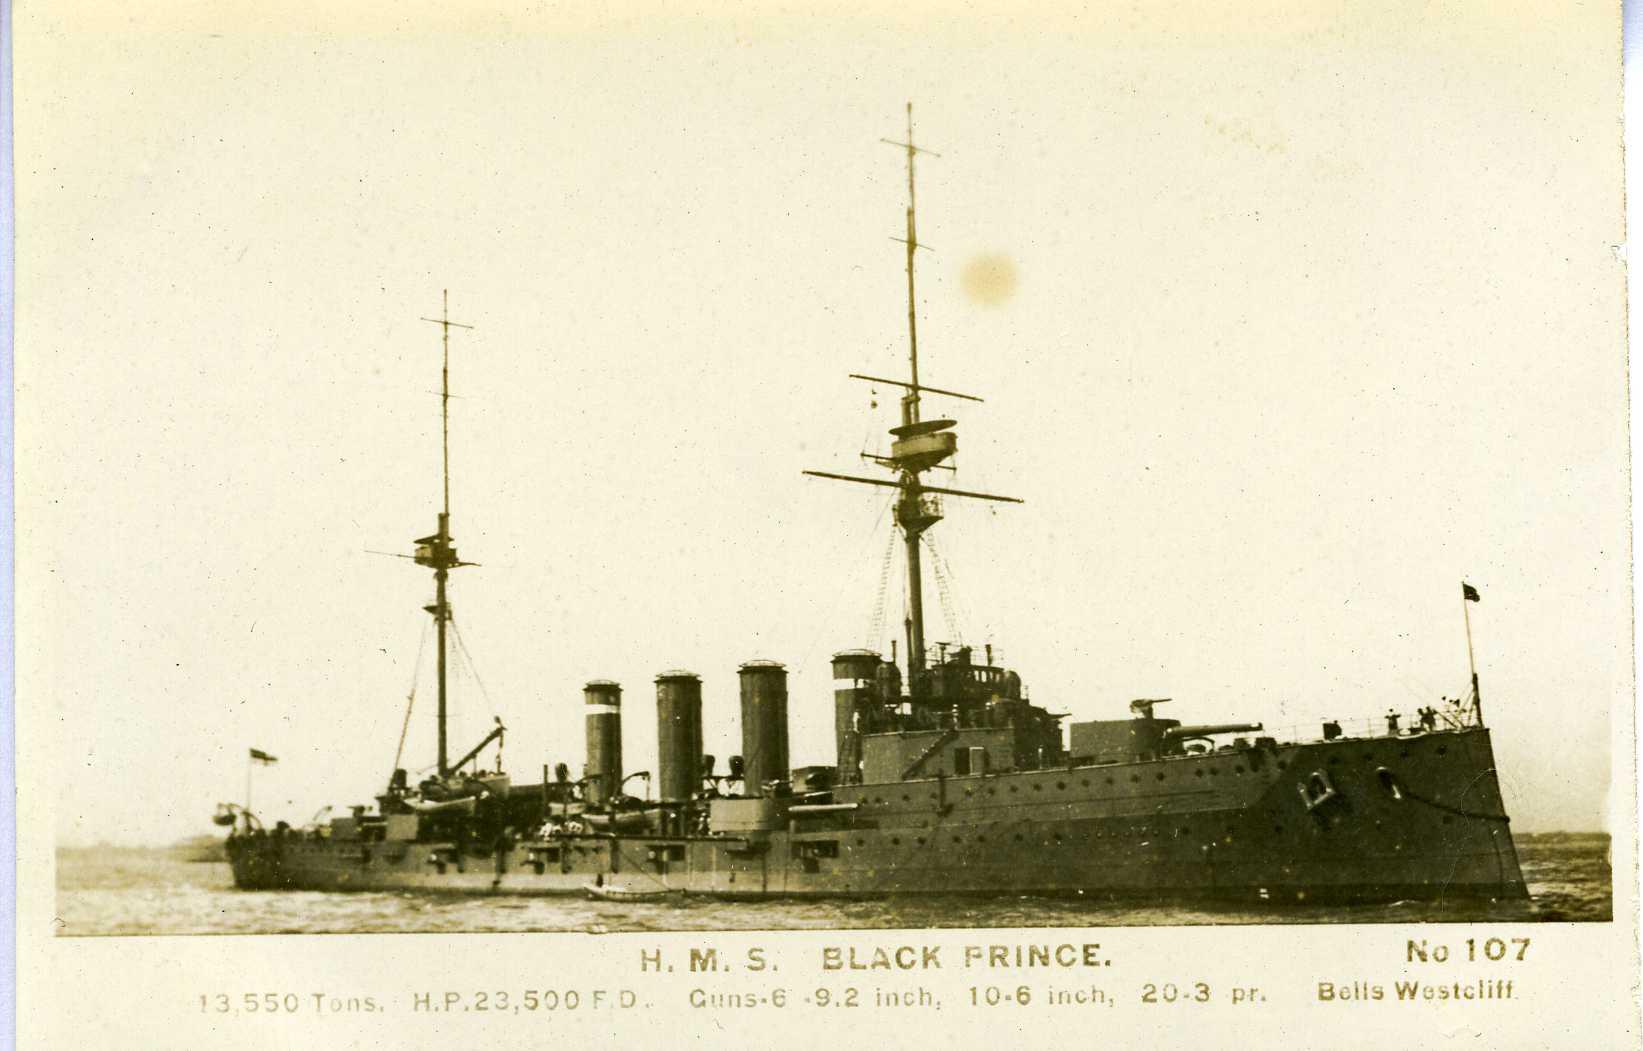
1.15-Rear Admiral Robert Arbuthnot-31.5.16 KIA Joined Grand Fleet from Mediterranean. Three of four ships (including Black Prince) sunk at Jutland - squadron disbanded. 1st
Cruiser Squadron [ii]
1.17-Rear
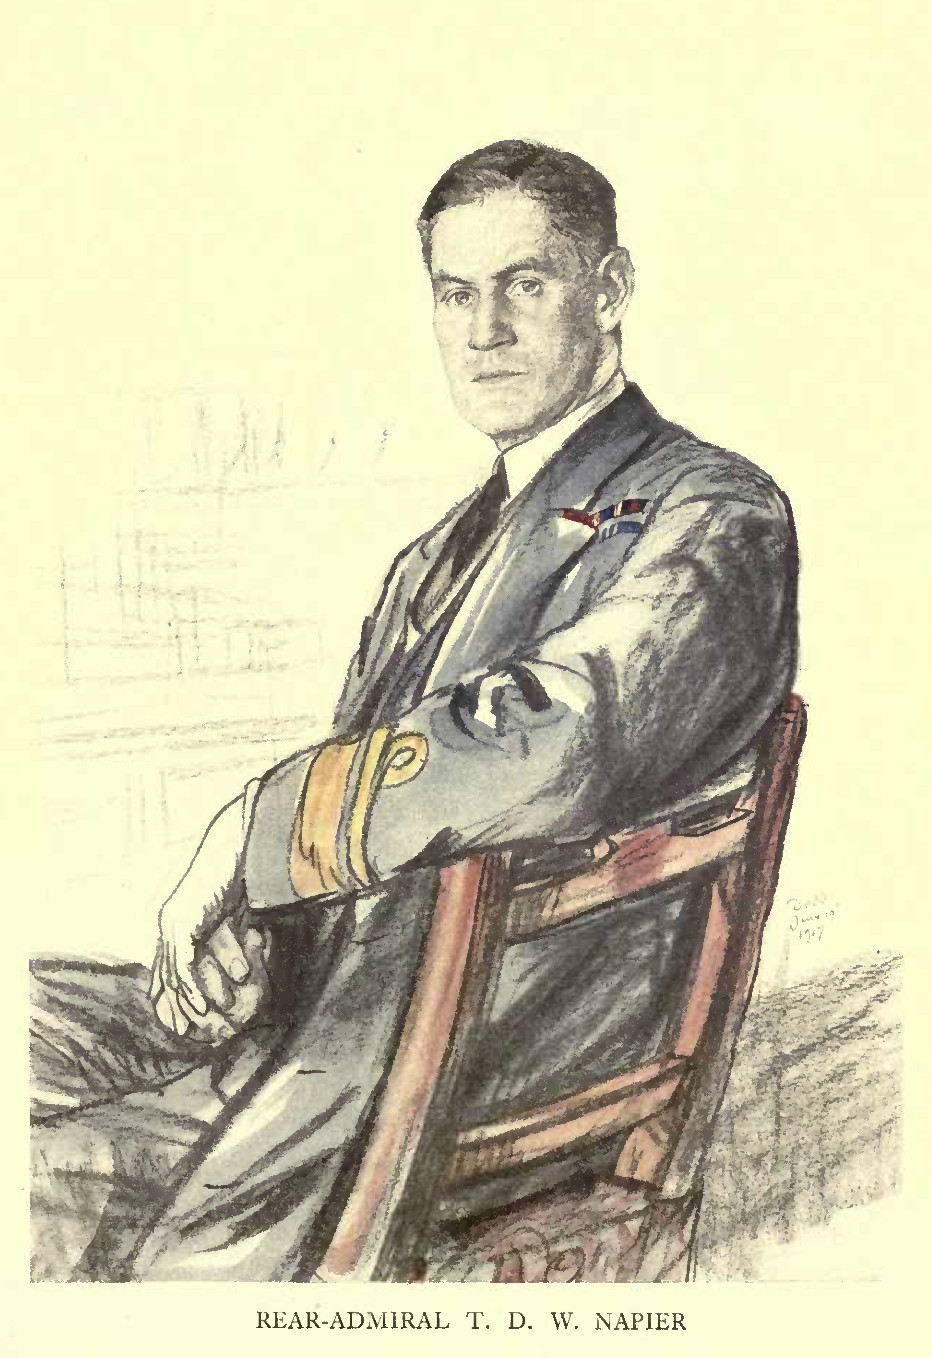
Admiral Trevelyan Napier
[also Commander Light Forces]
Formed to command HMS Courageous and HMS Glorious 2nd
Cruiser Squadron
Rear Admiral Somerset Gough-Calthorpe; 5.16-Rear Admiral Herbert Heath; 1.17-Rear Admiral Sydney Fremantle; 12.17-Rear Admiral Reginald Tupper; 2.18-Rear Admiral Edward Bruen Served in the Grand Fleet throughout the war. HMS Hampshire lost 5..6.16 whilst conveying Lord Kitchener to Russia
3rd
Cruiser Squadron
Rear Admiral William Pakenham; 3.15-Rear Admiral Lowther Grant; 11.15-Rear Admiral Montague Browning Served in the Grand Fleet until 6.16 - often assigned to accompany 3rd Battle Squadron. HMS Argyll wrecked 28.10.15 6th
Cruiser Squadron
Rear Admiral Lowther Grant Squadron dispersed 2.15 but individual ships remained with Grand Fleet until 10.15 7th
Cruiser Squadron
Rear Admiral Arthur Waymouth 4.15-Rear Admiral Loftus Tottenham; 10.15-Rear Admiral Herbert Heath Reformed in Grand Fleet 1.15. Disbanded 5.16
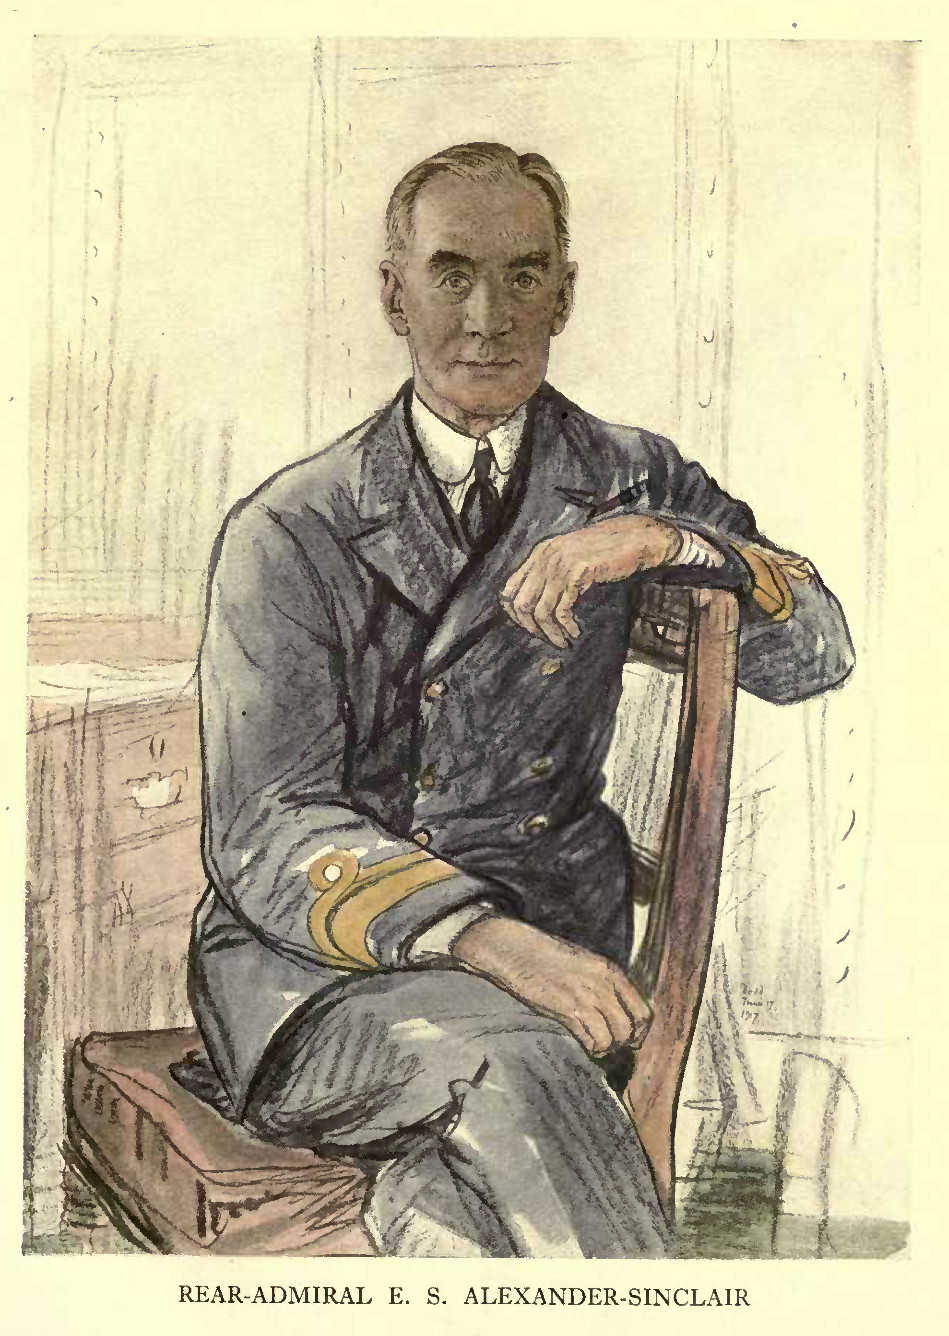
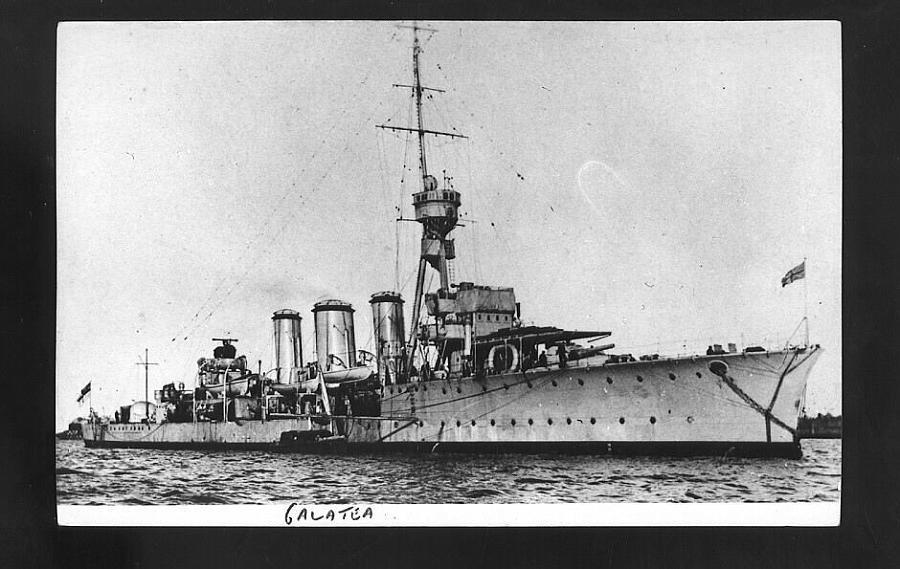
1st Light Cruiser Squadron Commodore William Goodenough; 1.15-Commodore Edwyn Alexander-Sinclair; 7.17-Rear Admiral Walter Cowan. Served in Grand Fleet 8.14-11.18. Town class until 2.15 then Galatea/C classes 2nd
Light Cruiser Squadron
12.14-Commodore Trevelyan Napier; 1.15-Commodore William Goodenough; 12.16-Rear Admiral Cecil Lambert; 2.18-Rear Admiral Michael Culme-Seymour; 5.18-Rear Admiral James Fergusson Formed with Town class cruisers 1.15. Re-organised 2.15 with ships from 1LCS. 3rd Light Cruiser Squadron 1.15-Commodore Trevelyan Napier; 1.17-Commodore Alan Hunt Formed with Town class cruisers 1.15 4th
Light Cruiser Squadron
6.15-Commodore le Mesurier 8.17-Commodore Rudolph Bentinck; 10.18-Rear Admiral Alan Everett Formed with mixture of Galatea and C class cruisers 6.15 6th Light Cruiser Squadron Rear Admiral
Edwyn Alexander-Sinclair
Formed with C class cruisers 6.17 7th
Light Cruiser Squadron
Rear Admiral George Borrett Formed with Galatea class and C class cruisers 3.18
1st
Destroyer Flotilla
20 Acheron [I class] which served with the Grand Fleet 8.14-11.16. In 6.16, 8 destroyers were detached to the Nore to protect 3BS - they became the new 1DF at Harwich 11.16. The rest of the flotilla either went to 2DF at Devonport or 6DF at Dover in 11.16 2nd
Destroyer Flotilla
20 Acorn [H class] which served in the Grand Fleet until 4.16. Goldfinch was lost 18.2.15. In 12.15-1.16 8 destroyers left for the Mediterranean. The remainder re-located to Devonport 4.16 3rd Destroyer Flotilla 18 L class
which went to Harwich on mobilisation.
3rd
Destroyer Flotilla
reformed
3.18 with M class destroyers
(new flotilla with old number)
4th Destroyer Flotilla 20 Acasta [K class] which served in the Grand Fleet until 9.16. Lynx was lost 9.8.15. The flotilla lost five members at Jutland - Ardent, Fortune, Shark, Sparrowhawk and Tipperary. The remainder transferred to the Humber 9.16 11th
Destroyer Flotilla
Formed 8.15 with 16 M class-with some R class later. Losses were Marmion 21.10.17; Setter 17.5.18; Tornado 23.12.17. Most members were replaced by 12 V& W types during 1918. 12th Destroyer Flotilla Formed 11.15 with M class which were replaced during 1918 with 13 S class and 6 V & W class. Losses were Nessus 8.9.18; Opal 21.1.18; Mary Rose 17.10.17; and Strongbow 17.10.17 13th Destroyer Flotilla Formed 4.16 with M class which were replaced gradually by 10 R class and 28 V & W class 1917-18 Losses were Nestor 31.5.16; Nomad 31.5.16; Negro 21.12.16; Narborough 21.1.18. 14th Destroyer Flotilla Formed 6.16 with M class to which were added some S class and V&W class late 1918. Losses were Partridge 12.12.17; Simoon 23.1.17 15th Destroyer Flotilla Formed 9.16 with R class 9.16. Losses were Pheasant 1.3.17; Ulysses 29.10.18
The 12th and
13th Submarine
Flotillas of K class boats served at Rosyth for
service with the Grand Fleet 1917-1918. [see Submarine
Flotilla section for more details].
The 1st, 2nd and 3rd Minesweeping Flotillas served with the Grand Fleet from 1915. The Scapa Local Defence Flotilla [River and 30kt tbd's] served in the area throughout the conflict. THE CHANNEL FLEET 1914-1915 On 8th August 1914, ships from the pre-war Second and Third Fleets were organised into the Channel Fleet. The task of this fleet was to deny German access to the English Channel, and, in so doing, protect the lines of communication of the British Expeditionary Force. Under the terms of the naval agreement with France, the Channel Fleet would protect the French coast as well. The Fleet carried out these tasks until it became clear that there was no threat of German heavy ships entering the Channel. Equally important, the demands for battleships in the eastern Mediterranean brought about its demise in early 1915.
Commander-in-Chief
Vice
Admiral Cecil Burney [former Commander 2nd & 3rd
Fleets]
12.14-Vice Admiral Lewis Bayly 1.15-Vice Admiral Alexander Bethell -3.15 Effectively the 2nd Fleet became the Channel Fleet; and the 3rd Fleet ceased to exist on mobilisation Eventually, two battle squadrons were formed on 8th August from the battle squadrons of the 2nd and 3rd Fleets, which went through the following stages: The 5th
Battle Squadron [2nd Fleet] received the two
Lord Nelson class.
Most ships of the 6th Battle Squadron [2nd Fleet] was dispersed to other squadrons: only three remained to join the Grand Fleet. The 7th and 8th Battle Squadrons [3rd Fleet] were amalgamated into a new 8th Battle Squadron. The plan to form a 9th Battle Squadron from 3rd Fleet ships was abandoned, and the ships were sent to the Humber for guardship duties. The new 8th Battle Squadron was broken up on 20th August when most of its ships were sent overseas to reinforce cruiser squadrons on trade protection duties. Consequently, the only effective battle squadron was the 5th: 5th
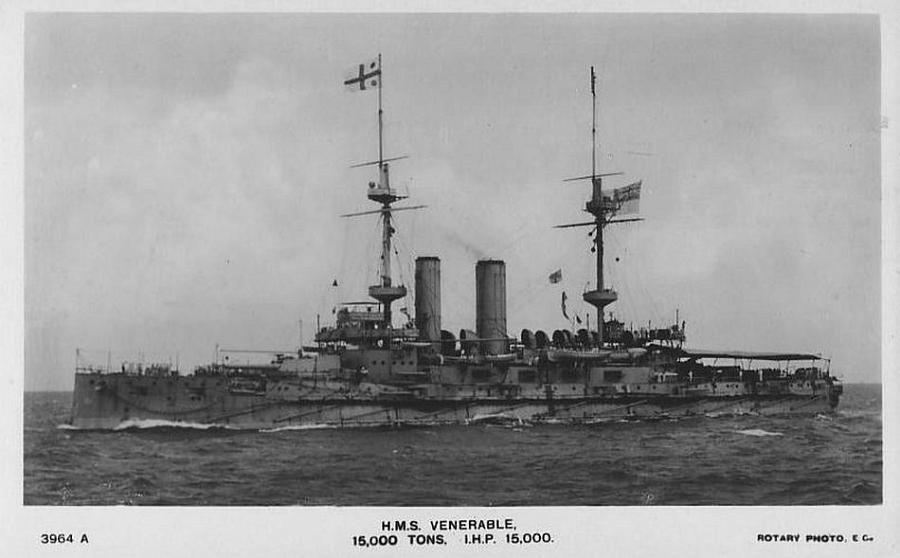
Battle Squadron
Vice
Admiral Currey, with Rear Admiral Cecil Thursby as
2i/c
Lord
Nelson [FF]
Agamemnon Prince of Wales Queen Formidable - lost 1.1.15 Implacable Irresistible Venerable London Bulwark -lost 26.11.14 all the surviving ships arrived in the Mediterranean between February and May 1915.
In a similar manner, the cruiser squadrons which were listed as components of the Second and Third Fleets were dispersed in the following manner. 5th
Cruiser Squadron
Rear Admiral
Archibald Stoddart
Deployed to Atlantic as Cruiser Force D and dispersed during 9.14 6th Cruiser Squadron Rear Admiral Lowther Grant joined Grand Fleet on mobilisation 7th Cruiser Squadron Rear Admiral Henry Campbell Joined Southern Force in North Sea as Cruiser Force C. Disbanded after loss of three cruisers on 22.9.14 8th Cruiser Squadron not formed
9th Cruiser Squadron Rear Admiral John de Robeck Deployed to Gibraltar and then West Africa as Cruiser Forces H [?] and I. Remained there until 11.11.18 10th
Cruiser Squadron
Rear Admiral Dudley de Chair Formed by redesignation of the Training Squadron at Queenstown. As Cruiser Force B it became the nucleus of the Northern Patrol. 11th Cruiser Squadron Rear Admiral Robert Phipps Hornby 9.14-Rear Admiral Loftus Tottenham Became Cruiser Force E for service off the west coast of Ireland. Dispersed by 1.15  Admiral R S P Hornby (Eleanor Williams) 12th
Cruiser Squadron
Rear Admiral Rosslyn Wemyss As Cruiser Force G, served in the western Channel as part of the Channel Fleet until 2.15 OTHER MAJOR FORCES IN HOME WATERS
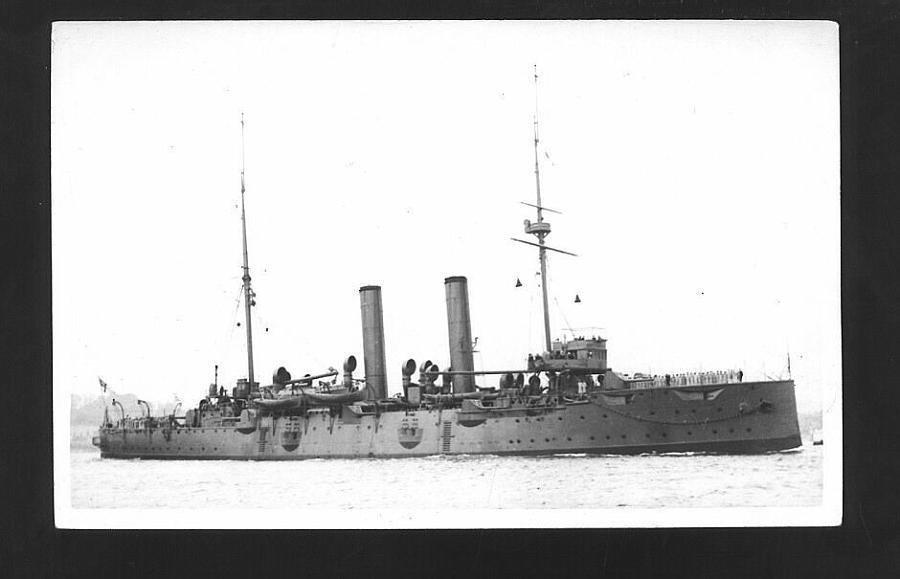
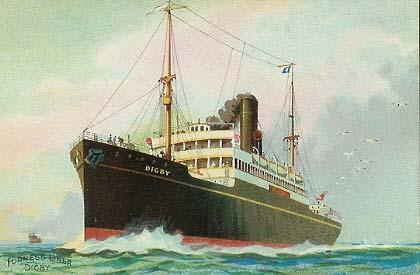
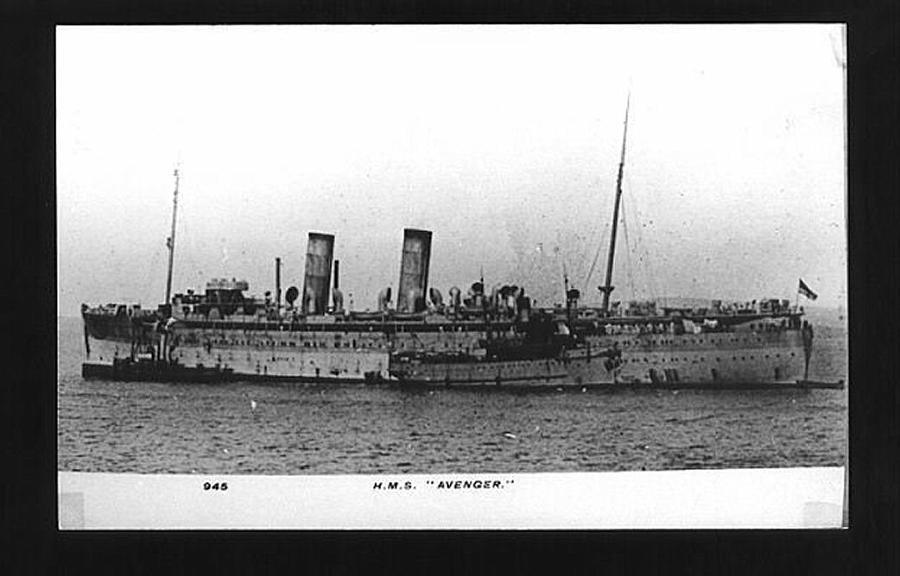
The Northern Patrol
8.14-Rear Admiral Dudley de Chair [also 10 Cruiser Squadron] 3.16-Vice Admiral Reginald Tupper To enforce the blockade, all ships destined for Germany and other northern European ports had to stopped, searched, and seized if necessary. The force given this duty was the 10th Cruiser Squadron. Initially composed of cruisers of the Edgar class, the squadron was enlarged to include a significant number of armed merchant cruisers (AMC, including Digby and Avenger). After the Edgars were withdrawn in spring 1915 for service in the eastern Mediterranean, armed merchant cruisers continued with this duty until December 1917. In January 1915, 23 armed merchant cruisers were in service, and this had increased to 26 by January 1917. The entry of the USA into the war eliminated the need to stop many of the neutral merchant ships. The main task of the navy in northern waters was then to impede access of German submarines into the Atlantic - this was the aim of Northern Mine Barrage, in which the US Navy played a major role. Admiral
of Patrol/East Coast of England
Rear Admiral
George Ballard
5.16-Rear Admiral Stuart Nicholson 7.18-Rear Admiral Edward Charlton Established prior to the war to command the patrol flotillas of destroyers and torpedo boats which were formed at various bases down the east coast of Britain, from the Forth to the Humber. The force would provide a more immediate defence against a descent by German forces on that coast. This task was carried out throughout the war. The major components were: 6th
Destroyer Flotilla, Dover - until 11.10.14 when it
became the Dover Patrol.
7th Destroyer Flotilla, Humber 8.14-11.18 [11 torpedo boat destroyers] 8th Destroyer Flotilla, Firth of Forth 8.14- .17 [8 torpedo boat destroyers] 9th Destroyer Flotilla, Tyne 8.14-7.15 [merged into 7 DF] [14 River class] They were supported by the relatively brief stay in the Humber of 4th Destroyer Flotilla 9-12.16. Submarine Flotillas were stationed at Blyth, Middlesbrough and Immingham. These will be described in the later section on submarine flotillas. The 20th Destroyer Flotilla [13 ships] was formed at Immingham to provide a fast minelaying capacity on the eastern side of the North Sea. Harwich
Force
Commodore Reginald Tyrwhitt 8.14-11.18
On mobilisation of the First Fleet, it was
decided to send two of its destroyer flotillas to Harwich.
They were 1st DF and the 3rd DF - the latter re-equipping
with L class destroyers. It seems that only the 3rd DF
actually went to Harwich, where it was joined by the 8th
Submarine Flotilla. Out of this the Harwich Force was
formed as a southern wing of the Grand Fleet. The
intention was to provide light forces which could impede
any movement by German surface forces into the North Sea
towards the east coast of England, or the Straits of
Dover. The Harwich Force grew in size as the war
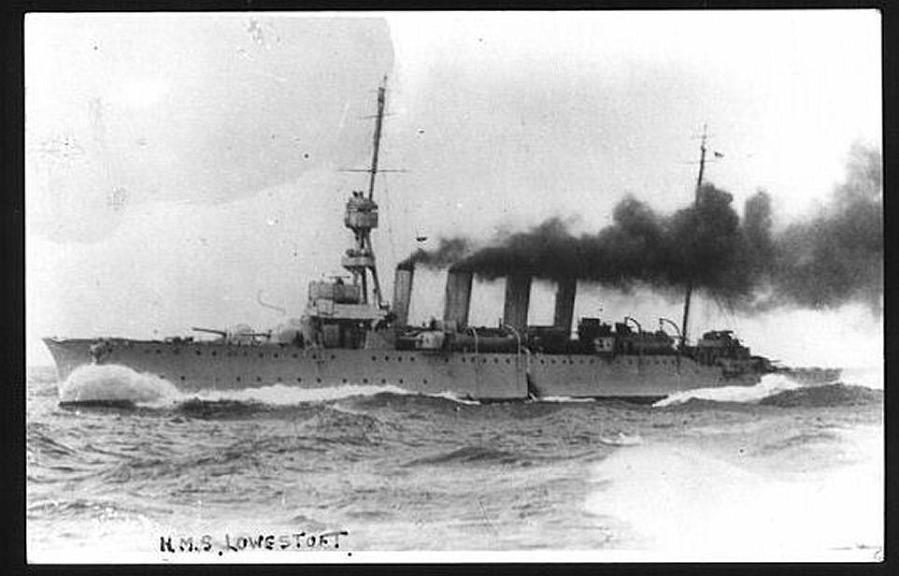
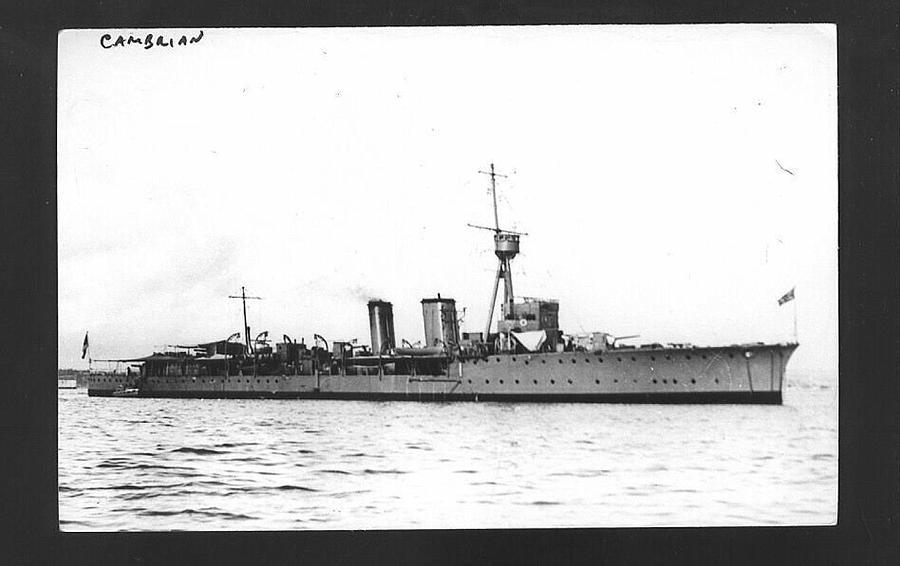
progressed. Its main components were: 5th Light
Cruiser Squadron: formed 9.14 with Galatea class ships
to which were added many C class cruisers, and several D
class cruisers in 1918.
3rd Destroyer Flotilla 8.14 - which became 9th Destroyer Flotilla 7.15-. 4.17 [22 L class] 10th Destroyer Flotilla 11.14-11.18 [M class - later R class] 1st Destroyer Flotilla 11.16-4.17 [9 Acheron class] The main submarine force was the 8th Submarine Flotilla which became the 9th Submarine Flotilla in 8.16. Up to five seaplane carriers served with the Force 1914-1915 to enhance its ability to discover enemy shipping. [Riviera, Engadine, Empress, Ben-my-Chree, Vindex] Some indication of the size of the Force can been seen below:
Southern Force
Rear Admiral Arthur Christian
A short-lived attempt to deploy the 7th Cruiser Squadron on patrol off the Dutch coast. It could draw up support from the Harwich Force. Abandoned after the loss of three cruisers on 22.9.14
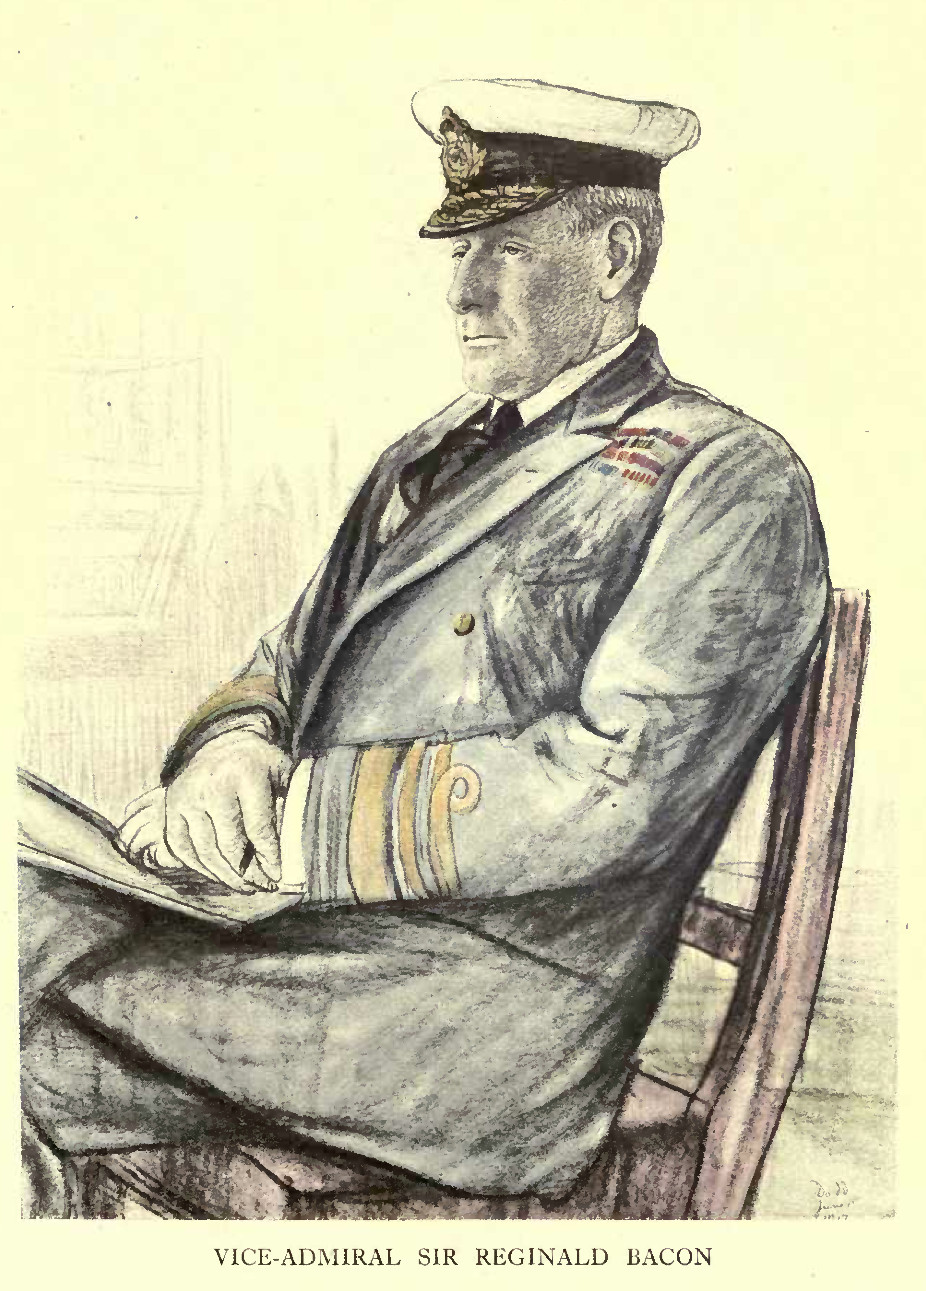
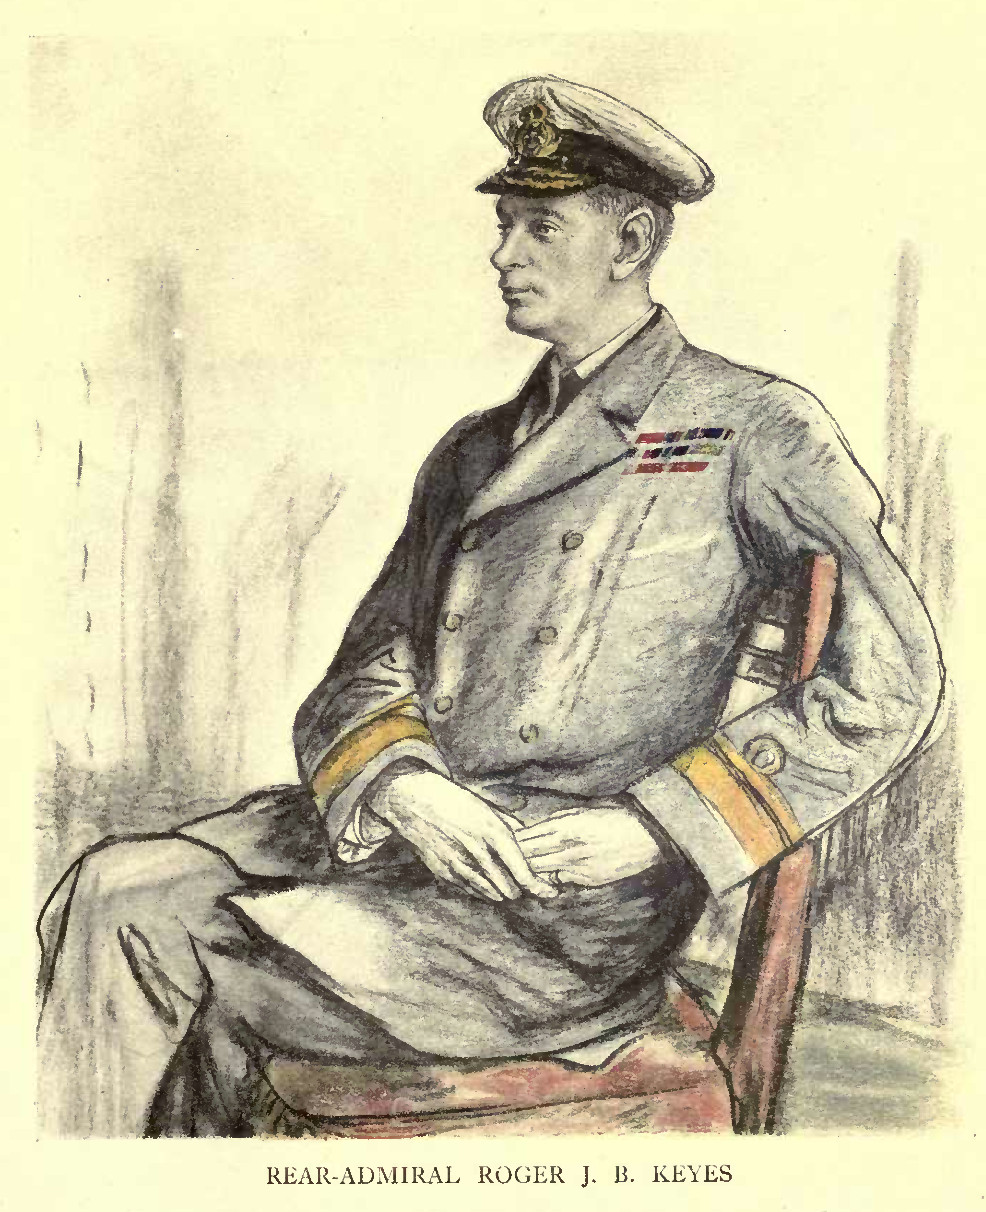
Dover Patrol
11.10.14-Rear Admiral Horace Hood
Formed by detaching responsibility for the
Straits of Dover from the Admiral of Patrols. 4.15-Vice Admiral Reginald Bacon ("Dover Patrol" by Adm Bacon) 12.17-Rear Admiral Roger Keyes The principal unit throughout the war was the 6th Destroyer Flotilla. Apart from those lost, the 12 Tribal class destroyers served at Dover throughout the war. They were joined by 11 30kt torpedo boat destroyers in August 1914. Further additions were 10 Acheron and Acasta class in 11.16; 17 L class between 1.17 and 3.17; 10 M class in 3-5.17; 6 M class in 2-4.17; 2 T class in 11.17, two old tbd's in 3.18; and 3 S class by 7.18. Together with 11 destroyer leaders this meant that 84 destroyers served at Dover, of these 8 were lost. A new task emerged in 1915 with the creation of a force of monitors to conduct bombardments on German positions on the coast of Flanders. In all 12 monitors conducted such operations from Dover. The 10th Minesweeper Flotilla served at Dover in 1918. Submarine
Flotillas
8.14-Commodore Roger Keyes (also
above)
2.15-Commodore Sydney Hall The Commodore [S] was responsible for operations at Harwich, and later, from other east coast bases. He was not concerned with flotillas elsewhere. But this is a suitable place to provide a brief outline of all the submarine flotillas which operated in Home Waters. Flotillas were re-numbered in August 1916: they are listed in accordance with the first number allocated. 1st
Submarine Flotilla, Devonport 8.14-2.16 disbanded
2 very old
A class for training
2nd Submarine Flotilla, Portsmouth 8.14- 6th Submarine Flotilla, Portsmouth-11.18 a varied
mixture of coastal boats and experimental boats for
trials
3rd Submarine Flotilla, Devonport 8.14-Yarmouth -1.15 disbanded B & C class for coast defence 3rd Submarine Flotilla, Immingham 9.16-3.17 D class
for offensive patrols
4th Submarine Flotilla, Dover 8.14- 5th Submarine Flotilla, Dover 8.16-2.18 disbanded Mainly C
class for local defence
5th Submarine Flotilla, Sheerness 8.14-4th Submarine Flotilla, Sheerness 8.16-9.17 disbanded C class
for coast defence
6th
Submarine Flotilla 8.14-2nd Submarine Flotilla 8.16-3rd
Submarine Flotilla 2.17- all Humber
C class
for coastal defence
7th Submarine Flotilla 8.14-Forth & Tyne 12.14-split into 7 SMF, Forth & 10 SMF. Tyne 7SMF
became 1st Submarine Flotilla 8.16-3.18 disbanded
C class for coastal defence 8th Submarine Flotilla, Harwich 8.14- 9th Submarine Flotilla, Harwich 8.16-11.18 Mainly E
class for offensive operations in North Sea - later
some G, H & L class boats
8th Submarine Flotilla, Yarmouth 8.16-11.18 Mainly H
class for offensive operations
9th Submarine Flotilla, Ardrossan 8.14- 7th Submarine Flotilla,Ardrosssan 8.16-1.17 Old boats
- eventually became Clyde Periscope School
10th Submarine Flotilla, Tyne 12.14- 3rd Submarine Flotilla, Tyne 8.16-1.17 disbanded Mainly C
class for coastal defence
10th Submarine Flotilla, Tees 9.16-11.18 G class
and later some E and L class boats for offensive
patrols
11th Submarine Flotilla, Blyth 11.15-11.18 G class
and then J class for offensive patrols
12th Submarine Flotilla,Rosyth 1.17-3.19 K class
for work with the Grand Fleet
13th
Submarine Flotilla, Rosyth 5.127-3.19
K class
for work with the Grand Fleet
Vulcan Flotilla, Killybegs 3.17- Rathmullin 7.17-Killybegs 8.17- Berehaven 9.17-1.18 D, E &
H boats for ASW patrols
Vulcan Flotilla, Kingstown 3-10.18 H class
for ASW patrols in Irish Sea
Vulcan Flotilla, Blyth 11.18-3.19 H class
for offensive patrols
Platypus Flotilla, Queenstown 4.17- Killybegs 6.17-Campbeltown 2.18-Pembroke Dock12.18-2.19 D class
then E & R class for ASW patrols
Ambrose Flotilla, Berehaven 12.17-Portsmouth 3.18- Devonport 11.8-3.19 L class
and some E & H class boats for ASW patrols.
This is an appropriate point to mention the Baltic Flotilla. Between
November 1914 and mid 1916 6 E class boats and 5 C class
boats were sent to the Baltic to operate with the
Imperial Russian Navy. Two were lost and the remainder
scuttled at Helsingfors to prevent them falling into
Bolshevik hands on 4.4.18
'Western
Approaches'
Unlike World War Two there was no Western Approaches Command to co-ordinate the campaign against the German submarines. Although a general lead was given by the Irish Command, other commands involved were Plymouth Command and Portsmouth Command. An additional factor was the presence of the United States Navy during 1917 and 1918. The major Royal Navy units were: Portsmouth
Escort Flotilla 1.16- retitled 1st Destroyer Flotilla
1.18
2nd
Destroyer Flotilla, Devonport 4.16- then Londonderry
from 11.17
4th Destroyer Flotilla. Devonport from 3.17 -these flotillas were not of conventional size and should be regarded as administrative rather than as tactical organisations. The Irish Sea
Hunting Flotilla had small groups of old torpedo boat
destroyers at Liverpool, Larne, Londonderry, Holyhead
and Kingstown.
1st Sloop
Flotilla, Queenstown
2nd Sloop Flotilla, Londonderry An overall impression of the total numbers involved can be seen in the following table:
In addition
to the submarines of the Vulcan, Platypus and Ambrose
Flotillas, seven USN submarines were stationed at
Berehaven.
5.
NAVAL OPERATIONS OVERSEAS
'ATLANTIC
CRUISER FORCES'
This heading in the Navy List covers all forces operating in the North Atlantic, West Indies, Mid-Atlantic, West Africa, South America and South Atlantic: from Newfoundland to the Cape of Good Hope. The purpose of this was to indicate the composition of various geographically spread forces - mainly cruisers and armed merchant cruisers - engaged in the same task. Their role was to protect the sea routes from attacks by German surface forces. This was to be accomplished by the formation of 'cruiser forces' which would be formed from units of the 2nd and 3rd Fleets. Operations in the this area can be divided into three phases: The active
hunting down of German cruisers between August 1914 and
January 1915. This phases included the defeat at Coronel
[1.11.14] and the victory over Admiral Graf Spee's
squadron at the battle of the Falklands [8.12.14].
There followed a relatively quiet phase in 1915 and 1916. From 1917 onwards there was a greater concentration of forces - of 4th and 9th Cruiser Squadrons - for Atlantic convoy duty. This task was carried out in conjunction with the US Navy's 'Cruiser-Transport Force'. In August 1914, the only forces in the area were: 4th Cruiser
Squadron [Rear Admiral Sir Christopher Cradock] - 5
cruisers. The 4CS had occupied a unique place since
1905. It was based in the West Indies during the summer
months, and at Devonport in the winter. It was a
training squadron used part-time to show the flag.
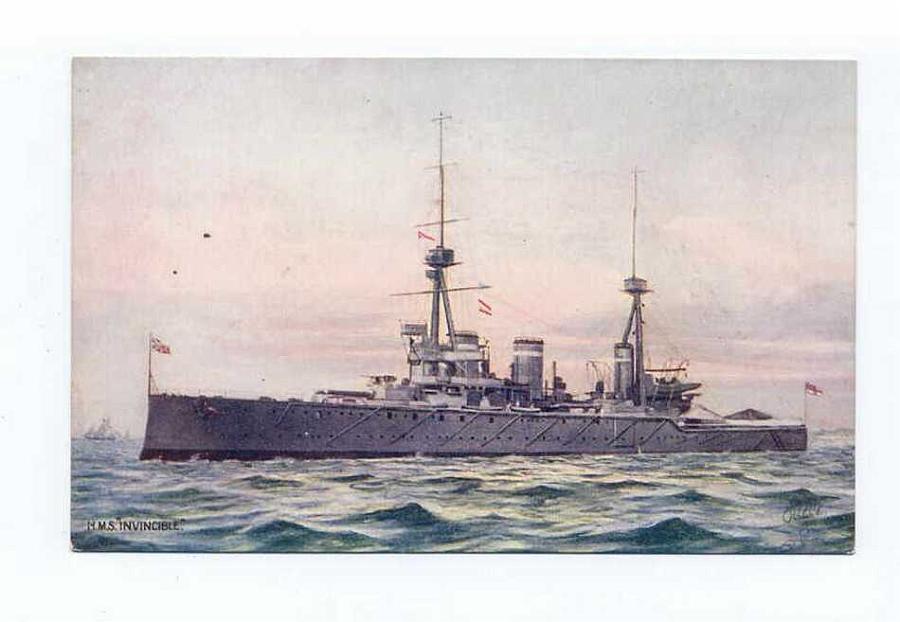
West Africa & South Atlantic -1 cruiser Cape of Good Hope - 3 cruisers The consequent distribution of forces can been seen in a series of snapshots: Note: after
the defeat at Coronel 1.11.14, a force of two
battle-cruisers was sent out from the UK. They were
Inflexible and Invincible under command of Vice Admiral
Doveton Sturdee, as CinC South Atlantic.
Flag Officers
THE MEDITERRANEAN
The Royal Navy took part in a rather disjointed allied effort to secure the Mediterranean for the strategic requirements of France, Italy and the United Kingdom. As a result Britain's naval forces operated in a confused inter-national command structure.  French
battleship Bouvet, also lost at Dardanelles
(PS)
As a result of an understanding between Britain and France, a strategic assignment of commands and ships was implemented in 1913. The naval agreement of that year assigned the Channel coast of France to the Royal Navy. In turn the French Navy assumed responsibility for any maritime war in the Mediterranean. This enabled Britain to concentrate naval strength against Germany; and for France to concentrate its fleet against two potential enemies - Austria-Hungary and Italy. The French battle squadron at Brest moved to Toulon, and the British battle squadron moved to Gibraltar and then to the UK. Concerns about British weakness in the Mediterranean brought up the partial return of the Royal Navy to Malta in the autumn of 1913 when a battle-cruiser squadron and an armoured cruiser squadron were sent out from Britain. As a result, the British force in the Mediterranean, under the command of Admiral Sir Berkeley Milne, consisted of: 2nd
Battle-Cruiser Squadron [3 ships on station]
1st Cruiser Squadron [4 ships] 4 light cruisers 5th Destroyer Flotilla [16 G class] The battle-cruisers and armoured cruisers were withdrawn within the first three months of the conflict. Admiral Milne was recalled after the 'Goeben affair' and not replaced. There would not be another Commander-in-Chief, Mediterranean, until August 1917 when Vice Admiral Somerset Gough-Calthorpe took up the position in a more limited role. Throughout the war years, the CinC of the 'Armee Navale' was the titular allied naval commander. Until August 1917, British forces operated in largely geographically separate self-contained commands. At first allied operations were made easier by the Italian decision to remain neutral. Only Austria-Hungary remained as the naval opposition. British mishandling of relations with Turkey in part brought about that country's entry into the war on 31st October 1914. This created a threat to British interests in the Suez Canal and Red Sea [which were handled by the East India Station until August 1917.] The Turkish declaration of war opened up an opportunity for Britain and France to use their naval power to seize the Dardanelles, Bosphorus and Constantinople and so establish a martime link with Russia. The British response was to create the Eastern Mediterranean Squadron [later British Aegean Squadron] which became the largest British force in the Mediterranean for the rest of the war. The entry of Italy into the war on the allied side in May 1915 may have brought its fleet into the war against Austria-Hungary but it did create a command problem. The Italian CinC - the Duke of Abruzzi - was more than a little reluctant to put his ships under French command. The result was the French fleet operating out of Malta, and then from Corfu and Brindisi, and the Italian Fleet operating from Taranto with little co-ordination between them. In response to an allied agreement the Royal Navy established the British Adriatic Squadron at Taranto. The three fleets failed to close the Otranto straits at the southern end of the Adriatic to Austrian and German submarines. This failure, compounded by the failure of British forces at Gibraltar to stop the entry of German submarines into the Mediterranean created a crisis in the early summer of 1917 which brought about the final organisation of British naval forces in the Mediterranean. An earlier arrangement [1.1.16] had divided the Mediterranean into areas of responsibility for anti-submarine warfare had failed because of boundary problems. Britain had been made responsible for the areas around Gibraltar, Malta, Egyptian coast, and Aegean. A new arrangement was made in the summer of 1917 by which Vice Admiral Somerset Gough-Calthorpe became CinC. He would have a co-ordinating role in the war against the submarines, and would command all British forces in the Mediterranean. He would NOT be the Allied CinC - that remained in the hands of the French, and he would fly his flag ashore in Malta. The previously assigned Admiral of Patrols would be his deputy for British efforts. An Imperial Japanese Navy destroyer flotilla [1 cruiser & 12 destroyers] joined the British forces at this time As a result, the British naval forces consisted of a number of sub-commands: Gibraltar,
Malta, British Adriatic Squadron, British Aegean Squadron, and the Egyptian Division. After the Turkish surrender, a Black Sea & Marmora Force was formed. A further major complication in tracing the employment and organisation of the Royal Navy was the lack of identified squadrons and flotillas. Apart the 5th Destroyer Flotilla, the only identified formation was the 8th Light Cruiser Squadron in the Adriatic in the autumn of 1918. As a consequence, there follows two sections on RN participation: list of relevant flag officers; snapshots of distribution at a variety of dates Relevant
flag officers
as of August 1914
Commander-in-Chief, Mediterranean
Admiral
Sir Berkeley Milne
11.14-vacant 8.17-Vice Admiral Somerset Gough-Calthorpe 1st
Cruiser Squadron 8.14 only-
Rear
Admiral Ernest Troubridge
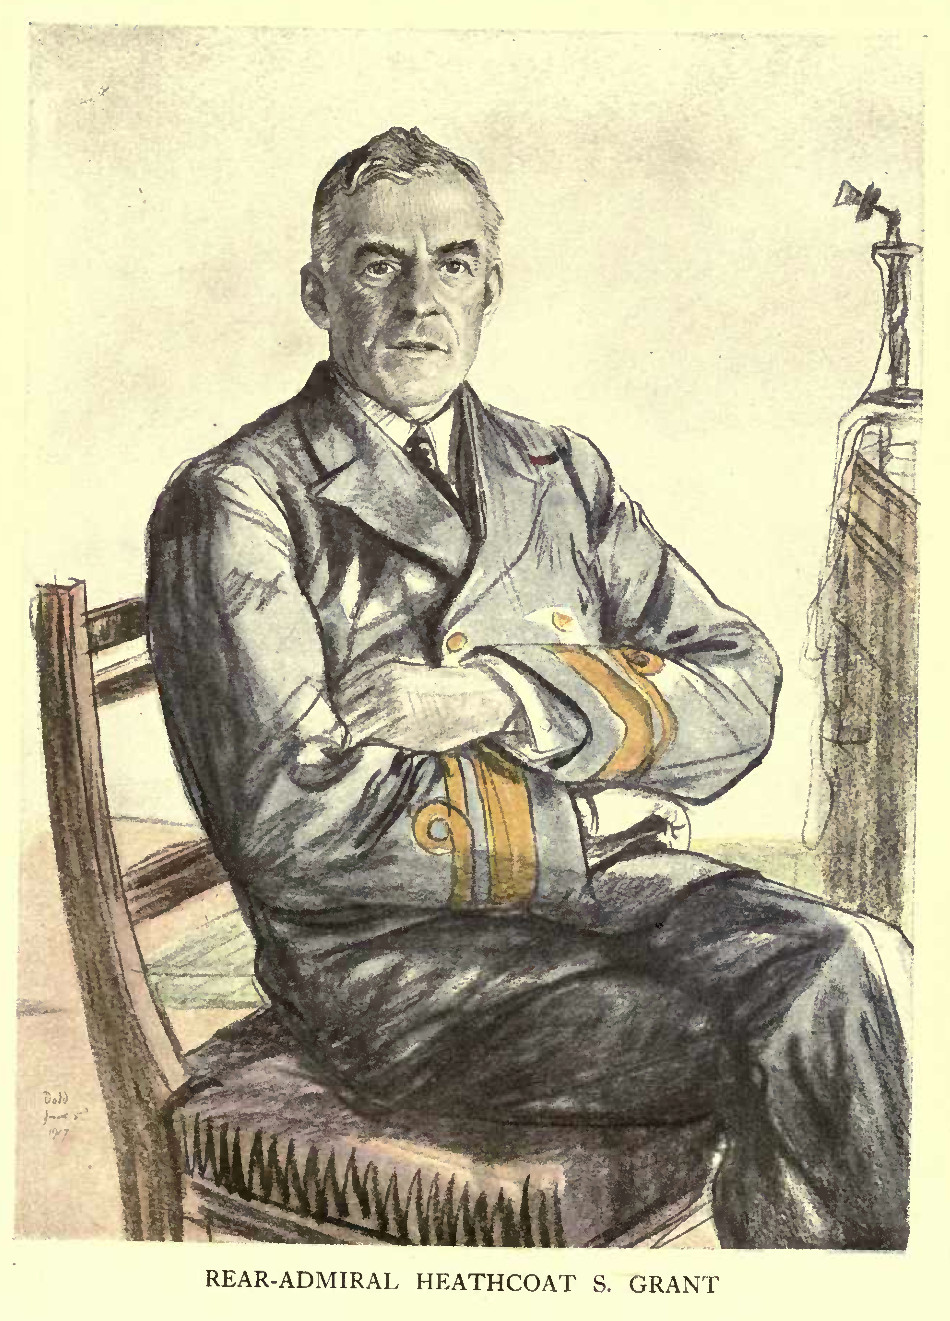
Gibraltar Vice
Admiral Frederick Brock
27.10.15-Vice Admiral Bernard Currey 7.17-Vice Admiral Heathcoat Grant Malta Rear
Admiral Sackville Carden [Superintendent Malta
Dockyard]
9.14-Rear Admiral Arthur Limpus [ex Head of Commission to Turkish Navy] 10.16-Vice Admiral George Ballard [& Admiral of Patrols] 11.18-Rear Admiral Brian Barttelot added subsequently CinC Eastern
Mediterranean/Aegean Squadron
10.14-Vice
Admiral Sackville Carden
3.15-Rear Admiral John de Robeck [2 i/c 2-3.15] 5.16-Rear Admiral Cecil Thursby 8.17-Rear Admiral Sydney Fremantle 1.18-Rear Admiral Arthur Hayes-Sadler 2.18-Rear Admiral Cecil Lambert 9.18-Rear Admiral Michael Culme-Seymour SNO Mudros
3.15-Rear
Admiral Rosslyn Wemyss
11.15-Rear Admiral Arthur Christian Commander British Adriatic Squadron 5.15-Rear
Admiral Cecil Thursby
5.16-Rear Admiral Mark Kerr 3.18-Rear Admiral Algernon Heneage Egyptian Division [& Red Sea] 5.17-Rear
Admiral Thomas Jackson
Admiral of Patrols 9.17-Rear
Admiral James Fergusson-4.18
Light Cruiser Squadron, Adriatic [later 8LCS] 9.17-Rear
Admiral Howard Kelly
Distribution
at a variety of dates
'THE
EASTERN FLEET'
Prior to August 1914, the Navy List grouped three stations
together under the heading of 'The Eastern Fleet'. One of
the three - the Australian Station moved out from this
listing and was identified separately as the 'Australian
Fleet'. In its place the listing was:
'East
Indies Squadron',
'China Squadron' and 'New Zealand Division' This is evidence of the pre-war plan to create an Eastern Fleet if and when the need arose. During the war, the differences of commitment between all four of the above elements became more obvious. By March 1915, the listing had changed to become: 'East
Indies & Egypt',
'East Coast of Africa', 'China Station', 'Australia' and 'Pacific'. This method of listing remained in the Navy List until 1918, when 'Cape of Good Hope' replaced 'East Coast of Africa'. The principal role of these various squadrons/stations was to 'show the flag' in distant waters and protect British commerce from German surface raiders - the latter was a major priority in 1914-1915. As the China Squadron 'lost' its main area of concern when Admiral Graf Spee's Far East Squadron sailed eastwards across the Pacific, the East Indies Squadron gained enhanced responsibilities. It supported operations off German East Africa; and the Turkish entry into the war gave it the task of protecting the Suez Canal and Red Sea, and then providing support for the military campaign in Mesopotamia. In each squadron, the number of warships allocated remained comparatively small in comparison with the resources allocated to European waters. The
principal flag officers were:
Commander-in-Chief, East Indies Rear Admiral
Richard Peirse [10.14-Vice Admiral]
1.15-Vice Admiral Rosslyn Wemyss 7.17-Vice Admiral Ernest Gaunt Commander-in-Chief, China Vice Admiral
Martyn Jerram
11.15-Vice Admiral Lowther Grant 6.17-Vice Admiral Francis Tudor SNO, Hong
Kong
Rear
Admiral Robert Anstruther
5.16-Commodore H Sandeman 5.18-Commodore Victor Gurney Commander, Australian Fleet Vice Admiral
George Patey -3.15
The changing strength of these various commands can be illustrated by the following snap shots: East
Indies, including East Africa, Red Sea & Egypt
when indicated
China
Station
New
Zealand Division
3 cruisers & 1 sloop listed 8.14 - none thereafter [in Australian or Pacific lists?] Australian
Fleet
Pacific
6. LIST OF SQUADRONS AND FLOTILLAS 1914-1918 Battle
Squadrons
1 BS Grand
Fleet 8.14-11.18
2 BS Grand Fleet 8.14-11.18 3 BS Grand Fleet 8.14- Sheerness 5.16-4.18d 4 BS Grand Fleet 8.14-11.18 5 BS Channel Fleet 8.14-3.15 5 BS Grand Fleet 10.15-11.18 6 BS dispersed 8.14 6 BS USN Grand Fleet 12.17-111.8 7 BS dispersed 8.14 8 BS Channel Fleet 8.14-8.14 dispersed 9 BS planned formation abandoned 8.14 Battle-Cruiser
Squadrons
1 BCS Grand
Fleet 8.14-11.18
2 BCS Med 8.14- Grand Fleet 1.15-11.18 3 BCS Grand Fleet 2.15-6.16 Cruiser
Squadrons
1 CS
Mediterranean 8.14- Grand Fleet 10.14-6.16
1 CS Grand Fleet 1.17-11.18 2 CS Grand Fleet 8.14-11.18 3 CS Grand Fleet 8.14-6.16 4 CS NAWI 8.14-11.18 5 CS Channel Fleet 8-9.14 6 CS Grand Fleet 8.14-10.15 7 CS North Sea 8-9.14 7 CS Grand Fleet 1.15-5.16 8 CS not formed 9 CS Gibraltar/West Africa 9.14-11.18 10 CS Northern Patrol 8.14-12.17 11 CS Channel 8.14-dispersed 12 CS Channel 8.14-dispersed Light
Cruiser Squadrons
1 LCS Grand
Fleet 8.14-11.18
2 LCS Grand Fleet 1.15-11.18 3 LCS Grand Fleet 2.15-11.18 4 LCS Grand Fleet 6.15-11.18 5 LCS Harwich 9.14-11.18 6 LCS Grand Fleet 6.17-11.18 7 LCS Grand Fleet 3.18-11.18 8 LCS Adriatic .18-11.18 Destroyer
Flotillas
1 DF Grand
Fleet 8.14- Harwich 11.16- Portsmouth 4.17-11.18
2 DF Grand Fleet 8.14- Devonport 4.16-Londonderry 11.17-11.18 3 DF Harwich 8.14-4.17 3 DF Grand Fleet 3.18-11.18 4 DF Grand Fleet 8.14- Humber 9.16- Portsmouth 12.16- Devonport 3.17-11.18 5 DF Mediterranean 8.14-11.18 6 DF Dover 8.14-11.18 7 DF Humber 8.14-11.18 8 DF Forth 8.14- .17 9 DF Tyne 8.14-7 .15 9 DF Harwich 7.15-4.17 10 DF Harwich 11.14-11.18 11 DF Grand Fleet 9.15-11.18 12 DF Grand Fleet 11.15-11.18 13 DF Grand Fleet 4.16-11.18 14 DF Grand Fleet 6.16-11.18 15 DF Grand Fleet 9.16-11.18 16-19 DFs not formed 20 DF Humber .18-11.18 Submarine
Flotillas
Sloop Flotillas 1918
1 SlF Queenstown 2 SlF Londonderry 3 SlF Dundee 4 SlF Granton 5-9 Sloop Flotillas not formed 10 SlF Adriatic 11 SlF Gibraltar 12 SlF Malta 13 SlF Egypt Minesweeping
Flotillas
1 MSF Grand
Fleet 8.14-11.18
2 MSF Grand Fleet .15-11.18 3 MSF Grand Fleet .16-11.18 4 MSF not formed 5 MSF not formed 6 MSF Harwich 1918 7 MSF Grimsby 1918 8 MSF Queenstown 1918 9 MSF Portsmouth 1918 10 MSF Dover 1918 11 MSF Liverpool 1918 12 MSF Clyde 1918 13 MSF Oban 1918 14 MSF Oban 1918 15 MSF Falmouth 1918 16 MSF Granton 1918 17 MSF Portland 1918 18 MSF Plymouth 1918 19 MSF Swansea 1918 20 MSF Felixstowe 1918 21 MSF forming at Kirkwall 11.18 7. SUMMARY OF ROYAL NAVY STRENGTH BY TYPE OF WARSHIP
plus Auxiliary Patrol (c4478 - including Fishery Reserve - but not all completed by war's end) and Support and Harbour Vessels |
||||||||||||||||||||||||||||||||||||||||||||||||||||||||||||||||||||||||||||||||||||||||||||||||||||||||||||||||||||||||||||||||||||||||||||||||||||||||||||||||||||||||||||||||||||||||||||||||||||||||||||||||||||||||||||||||||||||||||||||||||||||||||||||||||||||||||||||||||||||||||||||||||||||||||||||||||||||||||||||||||||||||||||||||||||||||||||||||||||||||||||||||||||||||||||||||||||||||||||||||||||||
|
return
to World War 1, 1914-1918 revised 27/10/15 |
||||||||||||||||||||||||||||||||||||||||||||||||||||||||||||||||||||||||||||||||||||||||||||||||||||||||||||||||||||||||||||||||||||||||||||||||||||||||||||||||||||||||||||||||||||||||||||||||||||||||||||||||||||||||||||||||||||||||||||||||||||||||||||||||||||||||||||||||||||||||||||||||||||||||||||||||||||||||||||||||||||||||||||||||||||||||||||||||||||||||||||||||||||||||||||||||||||||||||||||||||||||
|
||||||||||||||||||||||||||||||||||||||||||||||||||||||||||||||||||||||||||||||||||||||||||||||||||||||||||||||||||||||||||||||||||||||||||||||||||||||||||||||||||||||||||||||||||||||||||||||||||||||||||||||||||||||||||||||||||||||||||||||||||||||||||||||||||||||||||||||||||||||||||||||||||||||||||||||||||||||||||||||||||||||||||||||||||||||||||||||||||||||||||||||||||||||||||||||||||||||||||||||||||||||


