The decision was now
taken to use the LSL's to continue 5th Infantry's
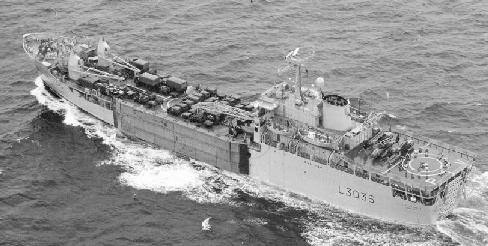
move forward. "Sir Tristram" reached Fitzroy on Monday 7th
to start unloading ammo, and in San Carlos Water, "Sir
Galahad" took on board the rest of the 1st Welsh from
"Fearless" before sailing around Lafonia to arrive on
Tuesday morning (8th). By now, only one LCU and a Mexeflote
were left to complete offloading "Sir Tristram", and
although by early afternoon, Rapier SAM's and 16 Field
Ambulance had gone ashore from "Sir Galahad", plans to move
the Guards to Bluff Cove to join the rest of the battalion
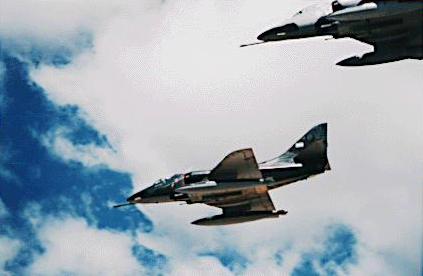
had come to nothing. Worse still, the LSL's had been
reported by enemy observers, and around 2.00 pm, five
Skyhawk's of Grupo 5 and five Daggers of Grupo 6 were coming
in over the Falklands.
First to be attacked by the
Daggers, but in Falkland Sound was frigate "Plymouth" on
her way to bombard an Argentine position on West Falkland.
Hit by cannon fire and four UXB's, one of which detonated
a depth charge, she was only slightly damaged. Shortly
after, the Skyhawks reached Fitzroy. Three of them put two
or more bombs into the crowded "SIR GALAHAD", and the
other two hit "Sir Tristram" with two UXB's killing two
crewmen. The ships caught fire and were soon abandoned,
but by then the results for "Sir Galahad" were
catastrophic with a total of 48 killed - five RFA crewmen,
32 Welsh Guards and eleven other Army personnel, with many
more badly burned and wounded. "Sir Tristram" was later
returned to the UK for repairs, but the burnt-out "Sir
Galahad" was scuttled at sea as a war grave on the 25th
June.
As the FAA's last major effort
continued, four Grupo 4 Skyhawks attacked troops in the
Fitzroy area later that afternoon, and minutes
after, four Skyhawks of Grupo 5 arrived over Choiseul
Sound to catch LCU F4 (belonging to "Fearless") sailing
from Goose Green to Fitzroy with 5th Infantry HQ vehicles.
Hit by one bomb, which killed the coxswain, Colour Sgt
Johnston (post QGM) and five of the crew, she shortly
sank. Two No.800 Sea Harriers over head on CAP immediately
dived to the attack and brought down three of the Skyhawks
with Sidewinders [a67, a68, a69].
During the week, both Land
Forces and 5th Inf HQ's moved to Fitzroy and 3 Cdo Bde's
to Mount Kent, and although the "Sir Galahad" disaster
caused delays, planning continued for the attack towards
Stanley. In the first phase, 3 Cdo Bde would take Mount
Longdon, Two Sisters and Mount Harriet, and if possible
Tumbledown Mountain and Wireless Ridge. Otherwise these
two plus Mount William would be assaulted in phase two,
and Sapper Hill and the ground south of Stanley in phase
three. As part of the build-up, 3 Cdo continued its
reconnaissance patrols, and the special forces their
covert operations, but with casualties. Only the previous
week, an SBS sergeant was killed in an accidental clash
with the SAS, and over on West Falkland, as the SAS kept a
careful watch on the two large Argentine garrisons there,
an observation post near Port Howard was surrounded on
Thursday 10th and Capt Hamilton killed as he tried to
fight his way out.
With seven of the eight infantry
battalions and all five 105mm batteries forward, the first
phase started on the night of Friday 11th, and by next
morning 3 Cdo Bde was on Mount
Longdon,
Two
Sisters and
Mount
Harriet,
but during the night there were other losses. The supporting
warships shelled Argentine positions in the mountains, and
near Stanley, a house in the capital was hit killing two
women and mortally wounding a third in the first and last
civilian deaths of the war. Then as
destroyer "Glamorgan" (pictured above) retired out
to sea after 45 Cdo's attack, a land-launched Exocet fired
from Stanley hit her in the hangar area, badly damaging that
part of the ship, killing thirteen men and destroying her
Wessex [b34].
The second phase was delayed
until Sunday night (13th), but by the morning, 2 Para had
taken Wireless
Ridge and
2nd Scots were on Tumbledown,
but too late for the Gurkhas to assault Mount
William in the
dark. The movements during the week of the attacking
battalions, including the Gurkhas (less C Coy at Goose
Green) are covered by Parts 44-48. As for 40 Cdo and the
1st Welsh, the badly depleted Guards stayed at Bluff Cove
until Friday 11th when they were reinforced by A and C
Coys 40 Cdo released from San Carlos defence (B Coy
remained), and marched that day to the south west of Mount
Harriet to stay in reserve for the next two days. During
this time, a battalion dispatch rider was mortally wounded
by Argentine shellfire.
Even aside from the Tuesday
strikes, there was little let-up in the air-war during the
week. On Monday morning (7th), a reconnaissance Learjet of
FAA Grupo 1 was shot down over Pebble Island by one of
"Exeter's" Sea Darts [a66]. Next day, the last two RAF
Harrier GR.3's from Ascension arrived on "Hermes", and
earlier, the fourth and last GR.3 lost was damaged beyond
repair landing heavily at the Port San Carlos FOB with a
partial engine failure [b33]. On Wednesday, RFA "Engadine"
flew off her four Wessex HU.5's of No.847 NAS to San
Carlos Water to add to the helicopter lift, and early
Saturday morning, in "Black Buck 7", Stanley airfield was
bombed by a Vulcan for the final time.
Sunday 13th saw the last
Argentine air raids. Late that morning, Skyhawks of FAA
Grupo 5 concluded their successful war with an attack on 3
Cdo Bde HQ on Mount Kent and 2 Para on Mount Longdon, but
without causing casualties, and that evening, two Grupo 2
Canberras bombed Mount Kent, and as they turned away, one
was brought down by a Sea Dart from "Exeter" (or possibly
"Cardiff") [a70]. All this time, RAF GR.3's were hitting
Argentine positions around Stanley, and still on Sunday,
made their first successful laser-guided bomb attacks.